
Do you want to change the WordPress font for your WordPress theme to something new? If so, you’ve come to the right place. We’ll show you how to do it step-by-step.
WordPress is a popular and flexible CMS platform that enables users to easily create websites and blogs. Your website’s typography (font) is important to its branding and usability, so changing it is an important decision.
Most WordPress themes come with built-in font-changing options, however, some are more flexible than others, and there are also different plugins that work with any theme that you can use.
Even though there are many plugins available to help you customize the font on your website, choosing the right one can be difficult and you can try changing the font without using a plugin.
In this article, we’ll show you how to change the font in WordPress without using a plugin by using the built-in options. Then, if your theme appears to lack the fonts you want, we’ll share some free plugins that you can use to add more font options to any WordPress theme.
Not only that, but we’ll also show you how to use the WordPress theme customizer to change the fonts for individual content like headings, H1, H2, H3, H4 tags, and so on.
Ready? let’s get started.
What Are WordPress Fonts?
Normally, a font refers to a set of characters with a particular style, shape, and size that is used to display text on a webpage, whereas fonts on WordPress refer to the styles and designs of the text that is displayed on your WordPress website.
WordPress comes with a wide range of default fonts that can be used on your website, but you can also use custom fonts to give your website or blog a unique overall appearance and make it stand out from other websites.
WordPress comes with two main types of fonts by default, which is listed below:
- System Fonts: These are the fonts that come with your operating system and that you can add by default to WordPress, such as Arial, Raleway, and Montserrat. These fonts are functional and easy to read, and they can be easily customized using WordPress’s customized settings, but they are not visually appealing.
- Custom Fonts: These are fonts that are not included in WordPress’s default font set. Custom fonts are available for download from websites that provide free or paid fonts, such as Google Fonts, MyFonts, or Adobe Fonts. Custom fonts can help your website or blog stand out from other websites by giving it a unique and personalized style and appearance.
Why Change WordPress Fonts on Your WordPress Website?
I know you might be asking yourself or wondering why you would want to change the fonts on your WordPress website. Don’t worry, there are different reasons why you should change the fonts on your WordPress website.
Your WordPress font is important to how your content appears to your readers. If your website has a difficult font to read, it will be difficult to keep visitors and retain them, and they will decide to abandon your website. For this reason, you should consider changing the fonts on your website.
WordPress themes by default come with lots of fonts, font sizes, and font color options for your website. However, if you want to make your website stand out, you should change the default font.
The following are a few reasons why most website owners and bloggers consider changing the fonts on their WordPress website:
- Branding: Because fonts can have an important role in your business branding, most website owners and bloggers changed their WordPress fonts in order to establish a distinct and easily identifiable brand reputation across all of their marketing efforts, including their website. Due to this, they use a font that is aligned with their brand’s visual identity.
- Differentiation: Most website owners and bloggers changed their WordPress fonts in order to differentiate their website or blog from competitors who use the same or similar default fonts. Due to this, they use a unique and customized font to make it memorable for their visitors.
That being said, let’s take a look at the several ways you can use to change WordPress fonts without using plugins. We’ll show you several methods, including without using a plugin and using a plugin.
How To Change WordPress Font Without Using Plugin
There are several ways you can use to change the font in your WordPress website without using a plugin, but in this article, we’ll go over two simple methods. And you can easily skip ahead to any section by clicking on the links below.
These two methods are:
- Using the WordPress Theme Customizer to change the font
- Using the WordPress Full Site Editor to change the font
Method 1: Using the WordPress Theme Customizer to change the font
Most WordPress themes support and depend on the native WordPress theme customizer for style and design customization, so you’ll usually find a font that matches your theme’s options there.
You can easily change the appearance of your website using the WordPress theme customizer, which displays a real-time preview. In most cases, if your customizer menu option is missing from your WordPress dashboard, it means your theme most likely has full site editing enabled, and you’ll need to use a different method or switch themes.
We’ll be using the KadenceWP theme in this tutorial. However, the customization options will change depending on the WordPress theme you are using. To find it on your theme, look in the customizer for the “Font” or “Typography” options.
Let’s get started.
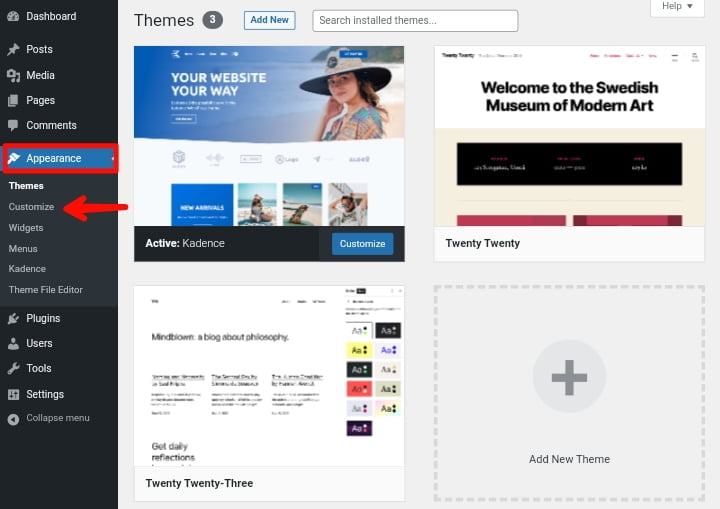
To change the font, first, log in to your WordPress dashboard and then navigate to “Appearance » Customize” from your WordPress dashboard.
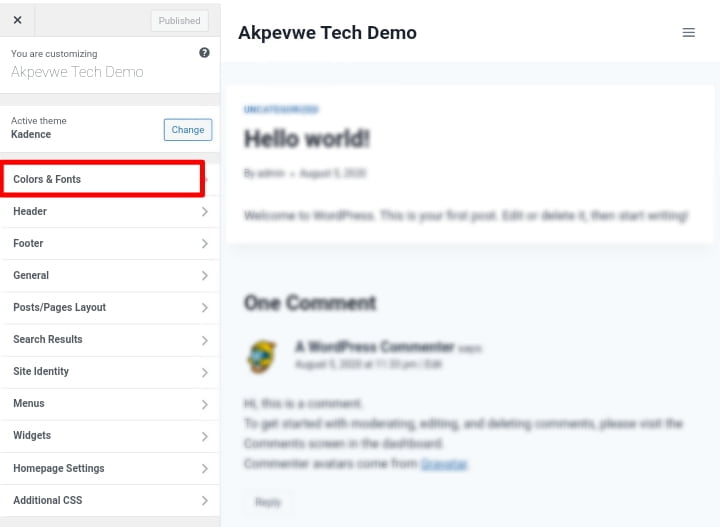
This will open the WordPress theme customizer. The KadenceWP theme includes a “Color & Fonts” section with options for changing the font, colors, and buttons on your website. To access the option for your website font, simply click on the “Color & Fonts” section. For other themes, you may need to check or explore the various settings areas.
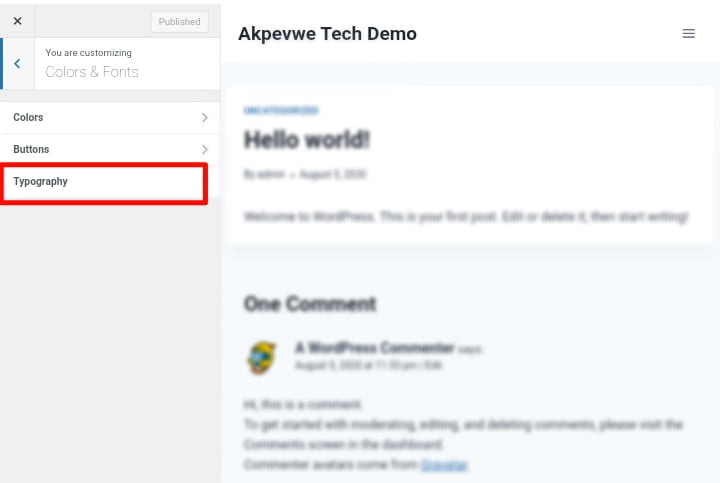
On the following screen, you’ll see three options: colors, buttons, and typography. To change the font on your entire website, go ahead and select “Typography” from the menu on the left.
The option to change the font will appear on the following screen. Under the “Base Font” section, by default, the System Default font is selected and you can change it to different fonts. The Base Font section allows you to change the font of your entire website.

Aside from changing the font for the entire website, you can also change the font for individual elements on your theme headings. Including the H1, H2, H3, H4, H5 and H6 tags.
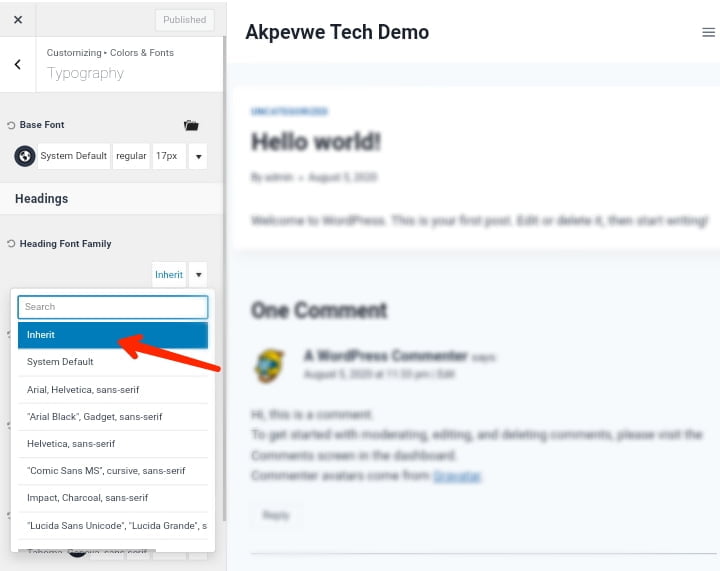
For example, you can open the font settings for your theme’s headings, such as the post/page title, if you wanted to change the font. With the KadenceWP theme, you can see that you have a variety of fonts to choose from, and you can also change the font for the entire headings with one click by clicking on the “Heading Font Family” and changing the font from there.
To change the font for the entire headings, on the Heading Font Family section click on “Inherit” and select a font from the dropdown menu. For example, if you want to change the font to “Inherit,” simply click on it and it will change to that font. If you know the name of your preferred font, you can also use the search bar to find it.
Aside from that, you can change the font size, weight, colors, and other settings. As you make your selections, the fonts in your theme’s live preview should update automatically.
When you’re satisfied with the way everything looks, click the blue “Publish” button to make your new font choices live.
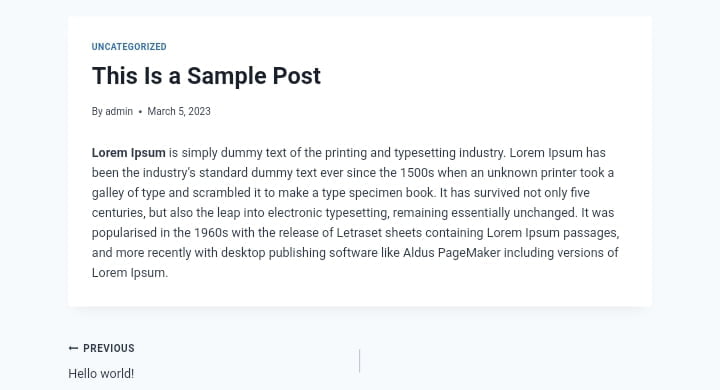
You can now see the new font live on your website. For example, on our demo website, we changed the body font to Inherit and the heading font to Inherit; see the screenshot below to see how it looks.
If you can’t find the Typography option in your theme to change your website font, it means your theme doesn’t support it. In that case, you can use the second method option, so keep reading.
Method 2: Using the WordPress Full Site Editor to change the font
If you’re using a block-based WordPress theme, such as the default WordPress Twenty-Twenty-Three theme or Divi Builder, then you can change the font of your website using the Full Site Editor (FSE).
Block-based WordPress themes let you use WordPress’s Full Site Editing (FSE) feature, which gives you more control over your website design by allowing you to style your website’s header, footer, sidebar, and other sections with custom blocks.
You may be wondering what Full Site Editing (FSE) is. It is a collection of modern features for the default WordPress Block Editor. It was first made available in WordPress 5.9 version.
Before it was officially released the WordPress Block Editor let you add and customize the layout of content within your pages and blog posts. While your WordPress theme determined the rest of your website’s layout and design.
Now that it has been released, WordPress full site editing lets you completely change the theme layout and add new sections to your website without writing any code. You can also add site-wide global styles that apply to your entire website, as well as individual styles for specific WordPress pages or posts.
Now that you understand what Full Site Editing (FSE) is, let’s look at how you can change the font on your WordPress website using Full Site Editing (FSE) In this tutorial, we’ll be using the default WordPress Twenty-Twenty-Three theme.
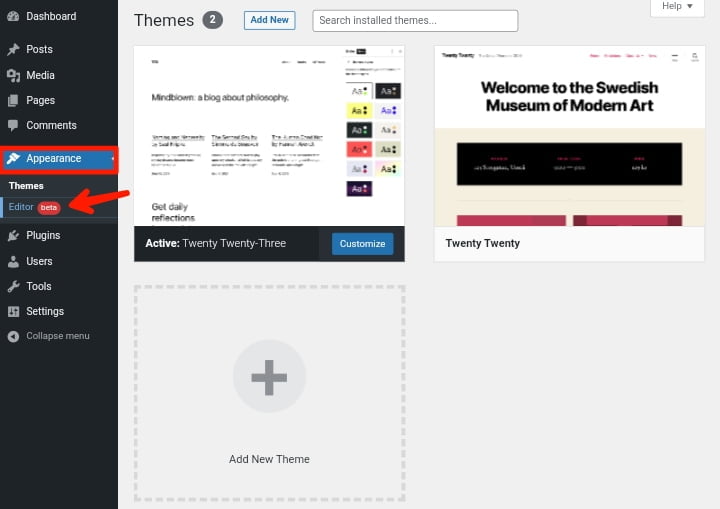
To start, navigate to “Appearance » Editor” from the WordPress dashboard in the left sidebar.
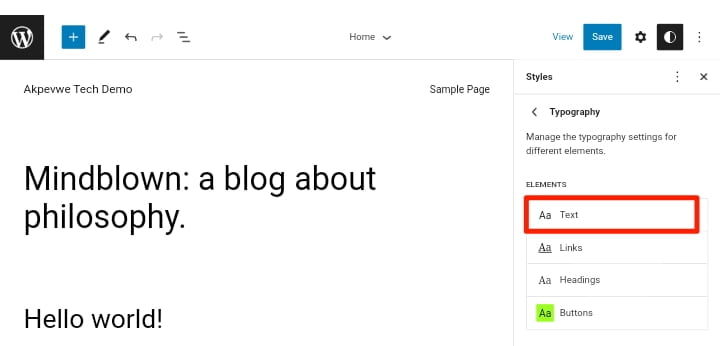
When you click on it, the full site editor for your WordPress theme will open. Then, in the top right corner, click the Styles icon, and then select the “Typography” option.
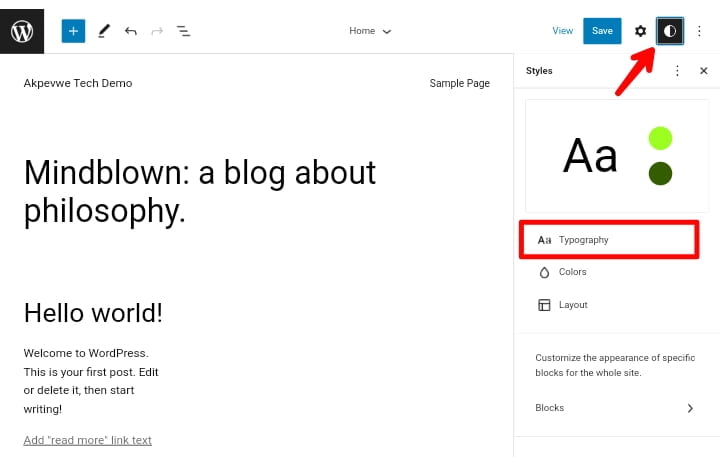
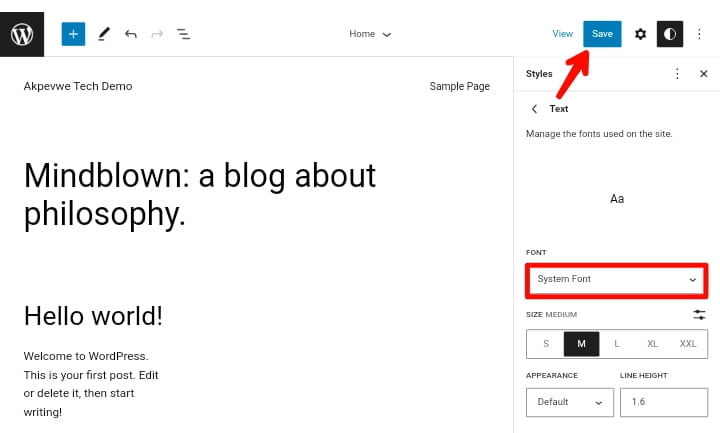
The option to change the font will then appear. To change the font, select elements such as the text and links to change the typography. To change the font, select “Text” as the element and then click the “System Font” dropdown menu.
You can select different fonts from the “System Font” dropdown menu. Once you’ve found the font you want to use, simply click on it and then click the “Save” button to make it live on your website. Using the full site editor, you have successfully changed your website font.
Next, let’s look at how to change the font on your WordPress website using a plugin. We included this method as a bonus, but you can use any method you want.
How To Change WordPress Font Using Plugin
If you followed the tutorial on how to change WordPress font up to this point and still can’t find the font you’re looking for in your theme’s built-in font options, your best option is to use a WordPress plugin that gives you access to more font options, specifically thousands of fonts in the Google catalog.
There are many free WordPress plugins available for changing the WordPress font on your WordPress website. Some popular choices are Easy Google Fonts, Use Any Font and Google Fonts Typography. However, in this tutorial, we’ll be using the Easy Google Fonts plugin.
Easy Google Fonts is a free WordPress typography plugin that allows you to add over 600 Google fonts and different font variants to your WordPress website.
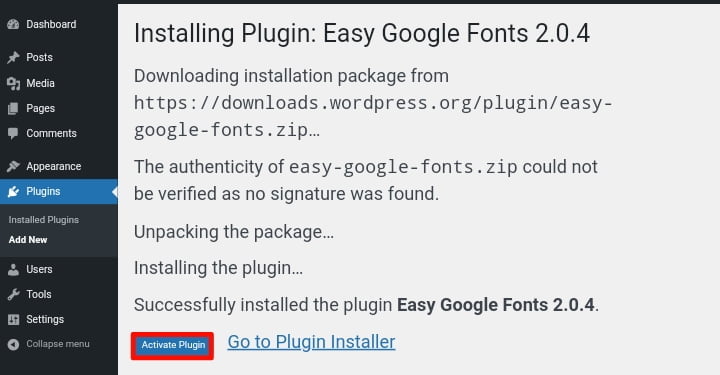
To change the font, install and activate the Easy Google Fonts plugin. To do so, first, log in to your WordPress dashboard and then navigate to “Plugins » Add New” from your WordPress dashboard.

Then, on the following screen, search for “Easy Google Fonts” and click “Install Now” when it appears. After installing the plugin, click “Activate Now” to activate it.

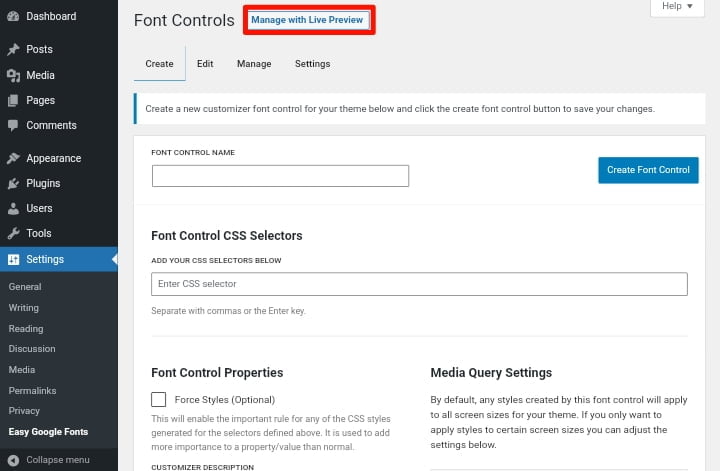
After activation, the Easy Google Fonts welcome screen will appear in your WordPress dashboard. To access the customization options, scroll down and click the “Go to Settings → Easy Google Fonts” button.

Once you’ve arrived at the following screen in the Font Controls tab, simply click the “Manage with Live Preview” button at the top to access the customization options.
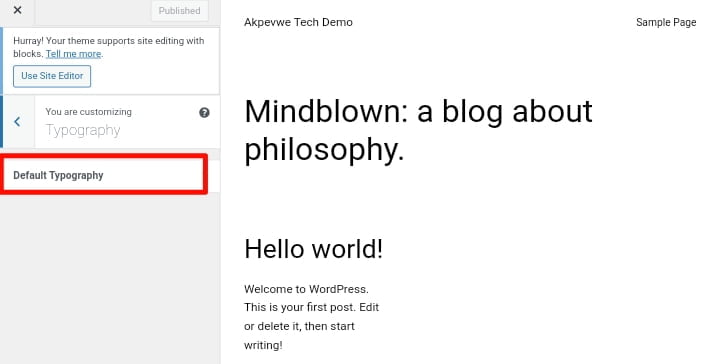
This will take you to the WordPress theme customizer. Look for a section in the customization options titled “Typography,” and then click on “Default Typography.”
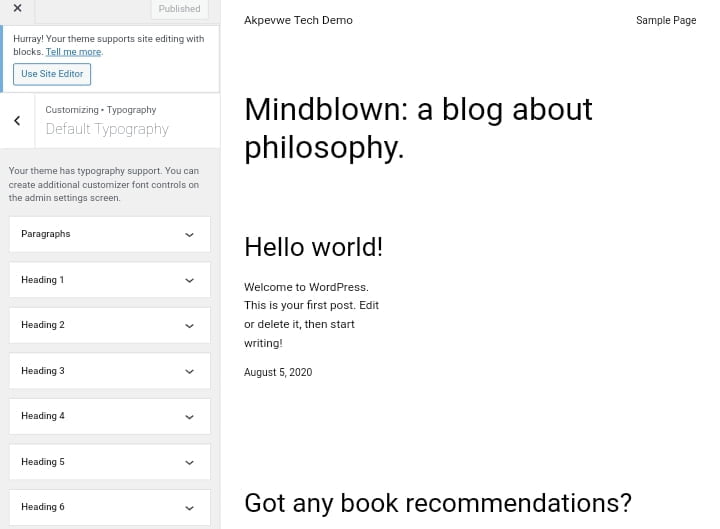
On the following screen, you can select which elements of your website, such as headings and paragraphs, should use the font for. You can also select the font family, font size, weight, and color.
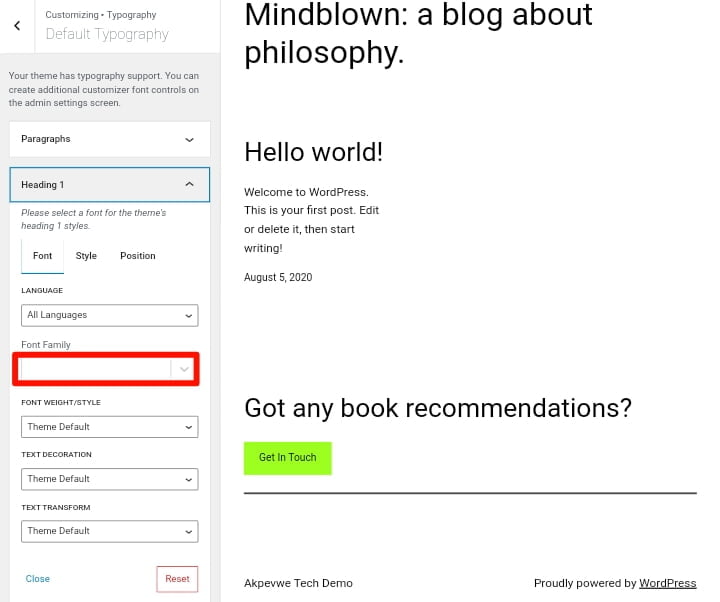
Let’s say we want to change the font of Heading 1. To expand the options, simply click the arrow next to Heading 1. From here, select a font from the “Font Family” dropdown menu.
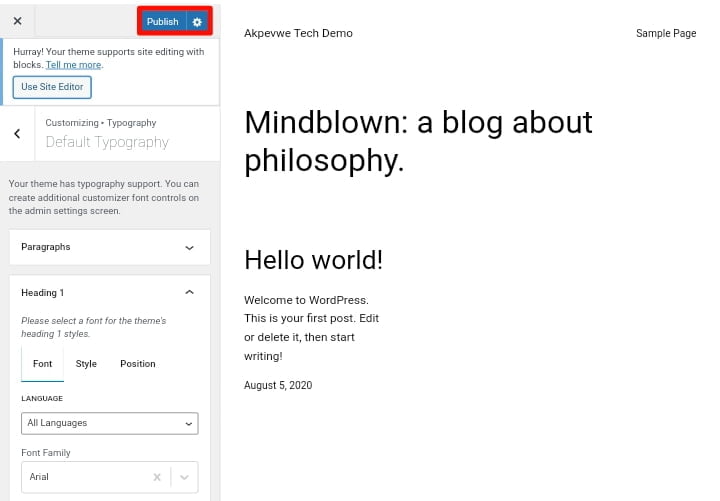
You can change the rest headings in the same way. After you’ve customized your font settings, click the “Preview” button to see how they look. This will display how your website will appear with the new font. If you’re satisfied with your changes, click “Publish” to save them to your website.
Let’s say you want to change the font on your website for a specific blog post or page; you can do so by using the content editor; next, let’s look at how to change the font using the content editor.
How To Change WordPress Font Using The WordPress Content Editor
The disadvantage of using this method is that the new font will only be applied to that specific post or page. You’d have to go through this process again for each post where you want to apply similar customization.
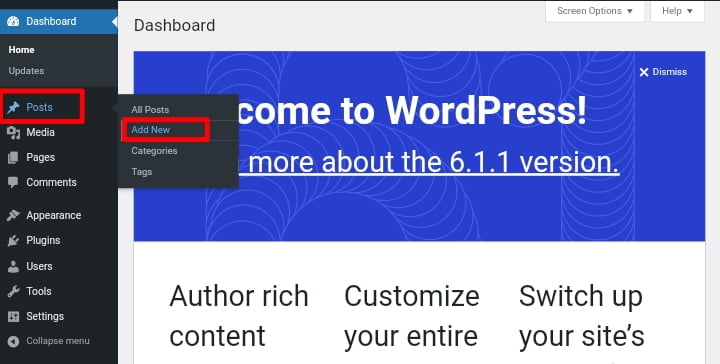
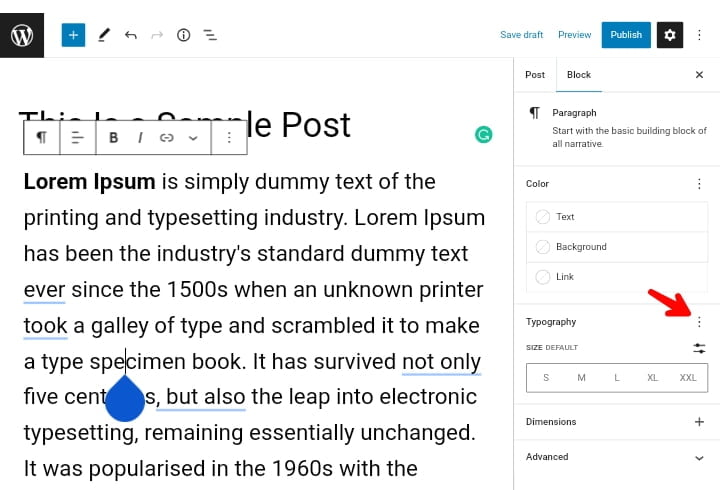
With that being said, to change the font in the WordPress content editor, go to “Post » Add New,” edit an existing post, or create a new one. And then select the text in the WordPress content editor to change its appearance.
Navigate to the “Typography” section in the settings panel on the right. Then, click the three dots next to Typography and choose “Appearance” from the dropdown menu.
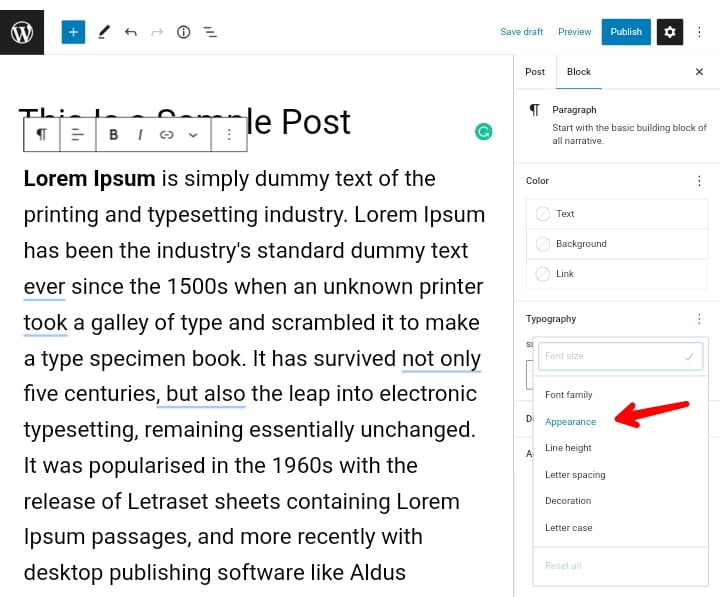
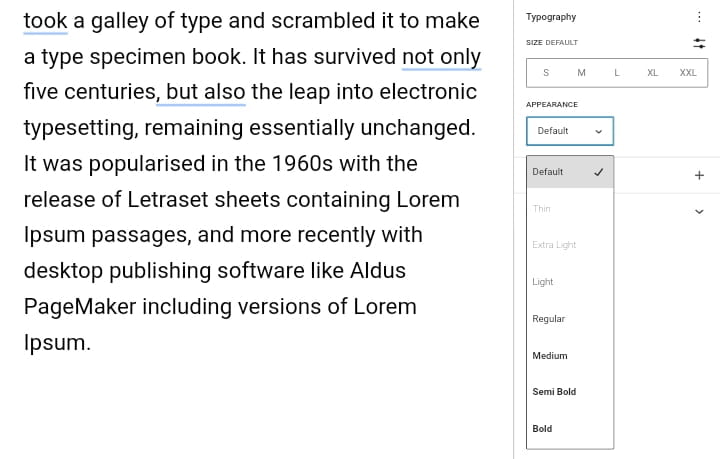
After that, the Appearance settings will be accessible from the Typography section. Simply select a font style from the dropdown menu under Appearance. You can, for example, make the font bold, thin, italic, black, bold italic, extra bold, or change it to medium, regular, and more.
Once you are done, if it’s an existing or previously published post, make sure to click on the “Update” or “Publish” button at the top right corner to save the changes.
And that’s all you have successfully changed your WordPress website font.
Recommend Reading: 10 Best Font Detector Tools For Identifying Font From Websites & Image
Conclusion
These are the methods you can use to change the font on your WordPress website. You can try any of the methods we provided, such as using a WordPress plugin or without using a plugin, any method you choose will work fine for your website.
If you’re already using a flexible WordPress theme, like KadenceWP, you can change your website font using the theme’s built-in typography options in the WordPress Customizer if you’re new to KadenceWP. To learn more about its features and how to use it, read our Kadence Theme Review.
You might also want to check out our guide on how to change your WordPress profile picture without using Gravatar, and if your WordPress website is slow to load and you want to improve the loading speed, you can do so by following the steps outlined in this guide.
We hope you found this article helpful. If you liked it, please share it on social media with others, especially those who want to change their website font, and if you have any questions please leave them in the comments section below.


Special Web Hosting Offer | $2.99/mo