
After you’ve successfully created your website, you’re probably wondering how to submit it to Google. In this article, we have put together this step-by-step beginner’s guide that will show you how to submit your website or blog to Google.
After you’ve successfully created your blog and published your first blog posts for all to see, you’ll need to add it to Google Search Console. This will display all of your content in Google right away. Google will then show your blog post to people who are searching for the questions you have answered on your blog.
So, how will you know if Google has already indexed your blog post? Let’s take a quick look at how you can find out if your website and blog posts have been indexed by Google and are appearing in Google search results.
To do so, simply type “site:yourwebsitename.com” into Google search. You will now see a list of all the pages, posts, and other types of content that Google has indexed.
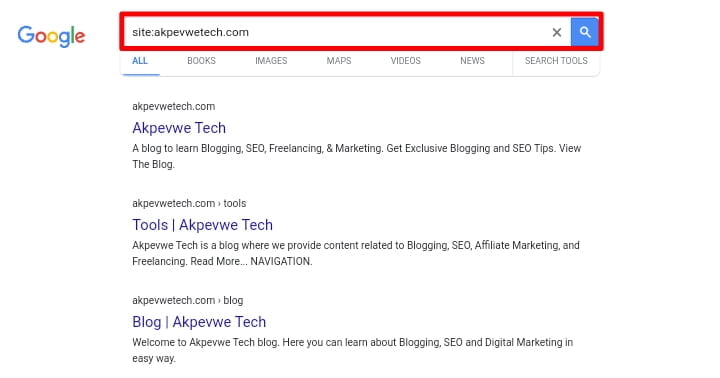
If Google does not give back any results, it means that Google has not yet found and indexed your website. In this case, submitting your website to Google is a good idea. You should then register your website with Google Search Console. So, let’s learn more about Google Search Console and how to submit your website to it.
Table of Contents
What Is Google Search Console?
Google Search Console is a free tool offered by Google that provides website owners with valuable information about how their websites perform in Google search results.
It was previously known as Google Webmaster Tools before being renamed Google Search Console, and it provides a variety of features to help you in optimizing your website or blog for Google search engine results from pages.
It offers insight into the search terms that bring visitors to your website, monitors the performance of your website in Google search results pages, and alerts you to potential issues that may affect your website’s search visibility, such as crawl errors, security issues, and others.
Why Submit Your Website To Google Search Console?
Submitting your website to Google Search Console is absolutely important if you want Google to know your website exists as well as improve your website visibility and understand how your website performs in Google search results.
If you are serious about increasing traffic to your blog or website organically and for free from Google, then you should add it to Google Search Console from the day you created it.
What Are The Benefits Of Google Search Console?
You will get lots of benefits from your website if you use Google Search Console. Here are some of the benefits you will gain if you submit your website to Google Search Console:
Now that you know why you should submit your website to Google Search Console and what benefits you will receive if you do, let’s look at how you can easily submit your website to Google Search Console for faster indexing and ranking.
How To Submit Your Website To Google Search Console
We will break down how to submit your website to Google Search Console into steps so that you can easily navigate to the steps you need and explain each step in detail so that you understand it better.
Step 1: Creating A Google Search Console Account
To submit your website to Google Search Console, you will need a Google account, which is the Gmail account you should already have by now. If you haven’t already, sign up for a Gmail account by visiting the signup page by clicking here.
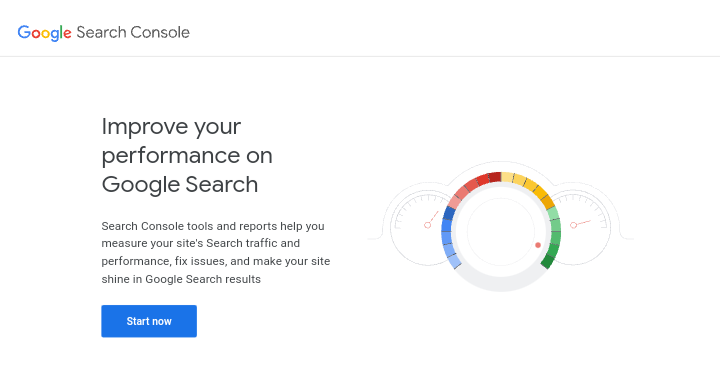
Once you’ve created your Gmail account, navigate to the Google Search Console homepage by clicking here and then clicking the “Start Now” button.
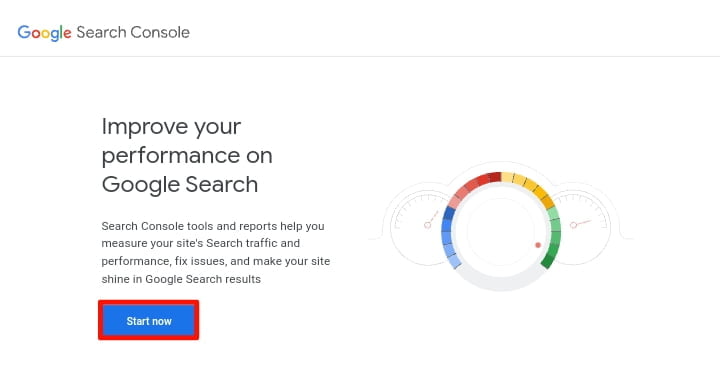
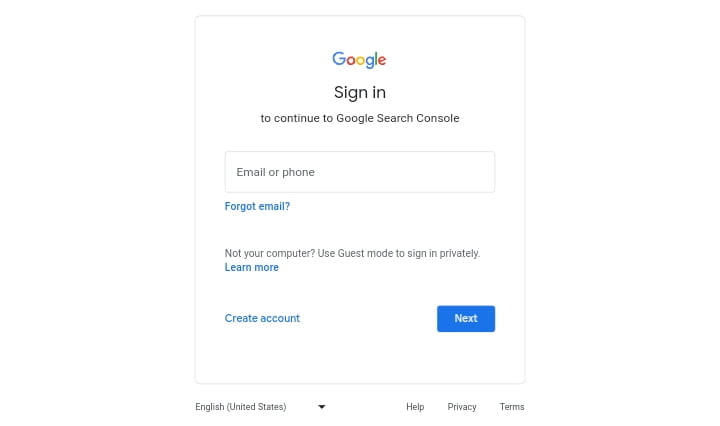
When you click the start now button on the homepage, you will be prompted to sign in to your Google account. Quickly sign in with the Gmail account you created and click next to proceed to the next step.
Step 2: Adding Your Website To Google Search Console
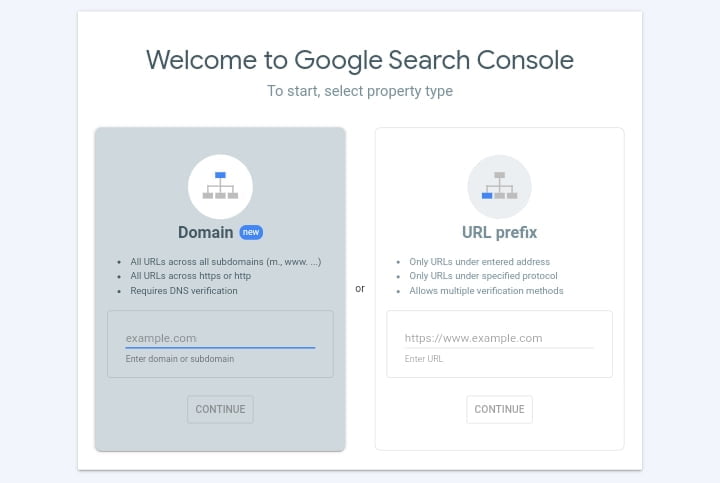
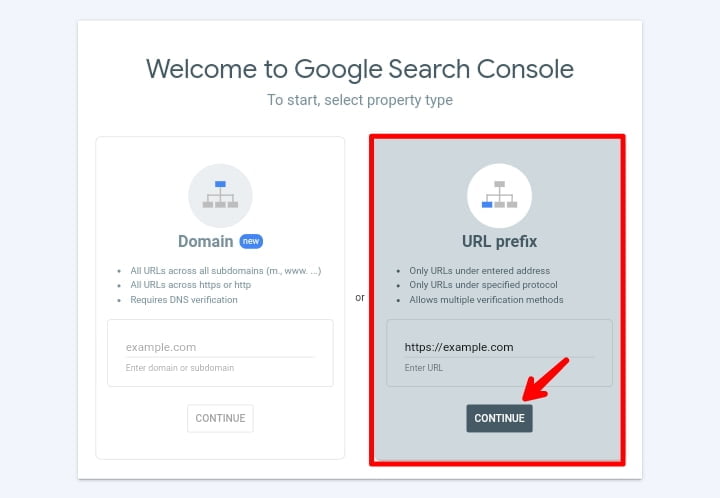
On the following page, you will be asked to select a property type, which is either the “Domain” or the “URL prefix“. These are the two methods for verifying a website; you can use either the domain name or the URL prefix. We recommend that you use the URL prefix method because it is more flexible and simple.
To avoid errors, enter your website’s correct URL in the URL prefix section. If you’re using WordPress for your website or blog and you’re having trouble finding the URL, there’s an easy way of finding out exactly what you need to enter there.
Simply log in to your WordPress admin dashboard and navigate to the “Settings » General” page, where you will find the Site Address (URL) and WordPress Address (URL) section, in that section, you will find your website URL.
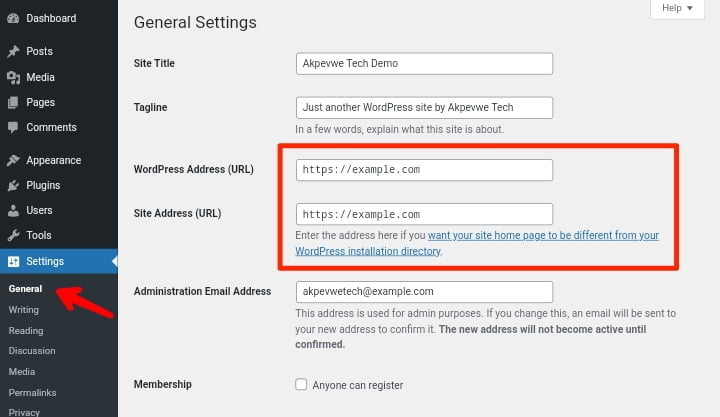
Simply copy it from there and go back and paste it on the URL prefix, then click the “Continue” button to proceed to the next step.
Step 3: Verifying Your Website Ownership
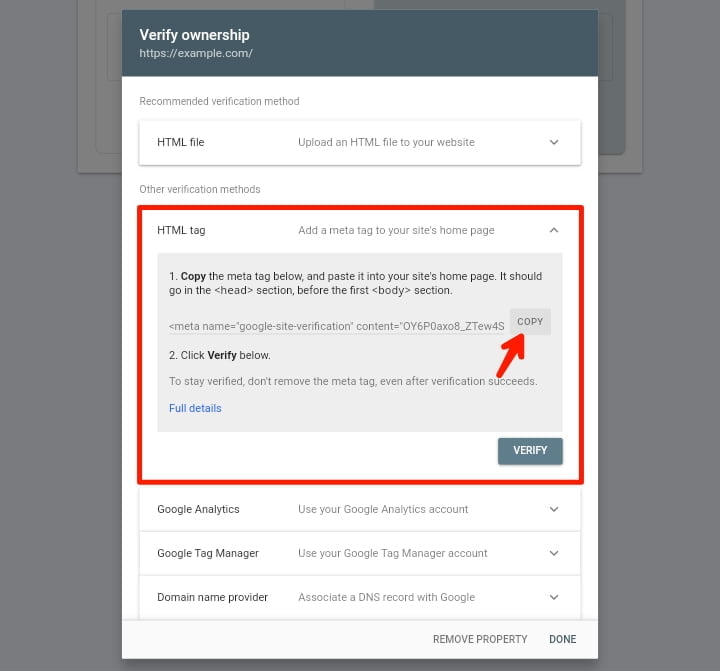
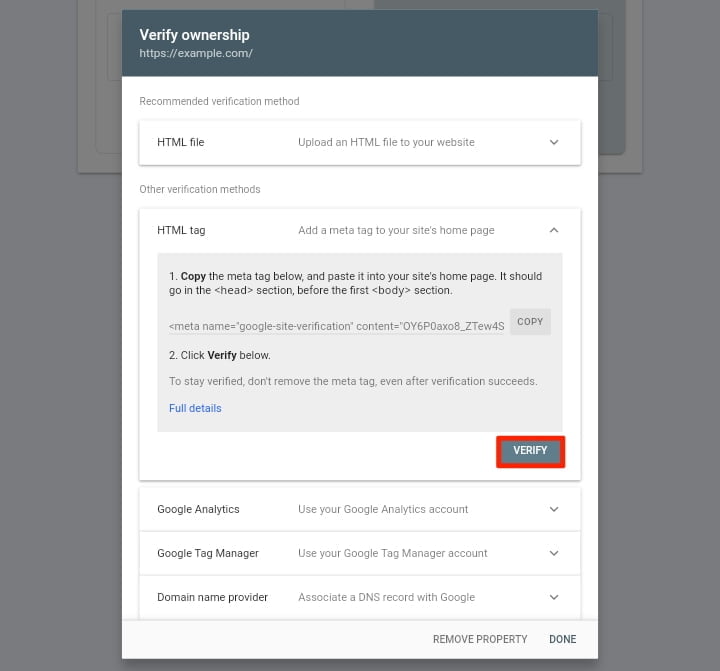
To submit your website to Google Search Console, you would first verify that you are the owner of the website. Google wants to make sure you own the website you’re submitting, so they offer several options for the verification, such as adding a meta tag to your website’s HTML code, uploading an HTML file to your website’s root directory, or adding a DNS record to your domain’s DNS settings.
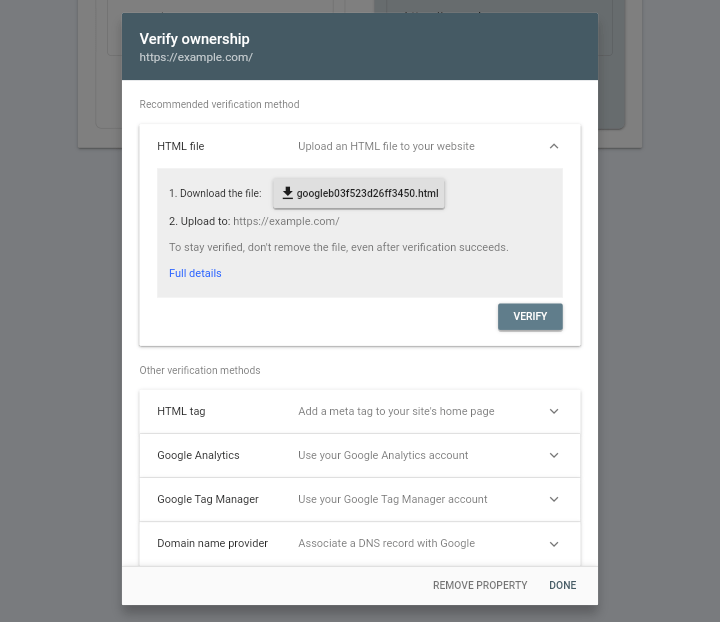
We recommend using the adding a meta tag to your website’s HTML method because it is easy and simplest; there are many SEO plugins that can help you in doing so without touching your website code or editing anything; we will show how to verify your website’s owner using the HTML tag method.
Most tutorials will guide you to simply edit the header.php file in your WordPress theme and insert the code just above the tag. However, we do not recommend this method because the HTML tag you added will be lost if you update or change your theme in the future. Google checks for the HTML tag on a regular basis and will disable your access to website data in the search console if it cannot find the verification tag on your website.
Now we’ll show you how to use a WordPress SEO plugin to verify your ownership of the website. There are many SEO plugins available, such as Yoast and All In One, but we recommend using the RankMath SEO plugin because it has a user-friendly interface and provides more SEO benefits for your website.
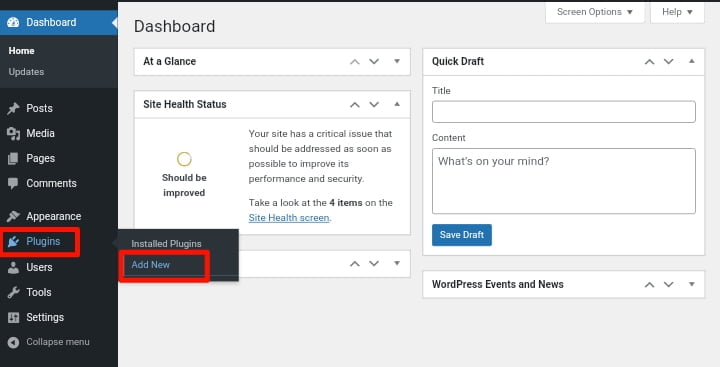
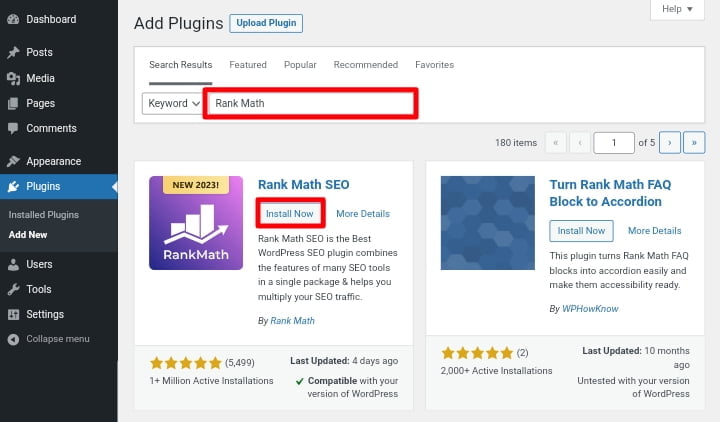
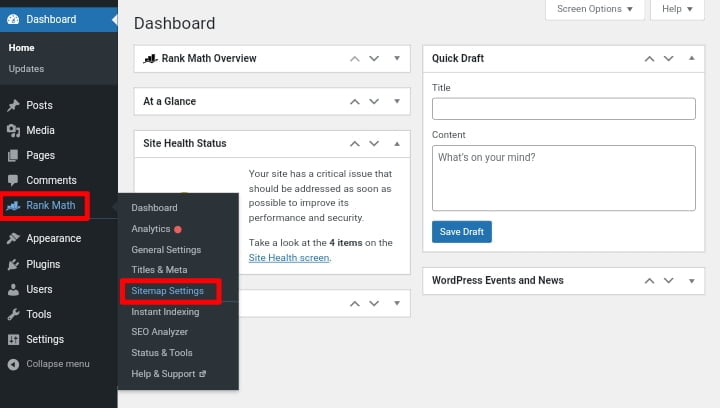
Click on the HTML tag section to expand it, and then copy the code inside it. Return to your WordPress website dashboard, go to the plugin section, and then click on “Plugin » Add New“, and then search for RankMath.
Once that is done, simply click on “Install Now” and then click “Activate” to activate the plugin because you need to install and activate the RankMath plugin before you can use it.
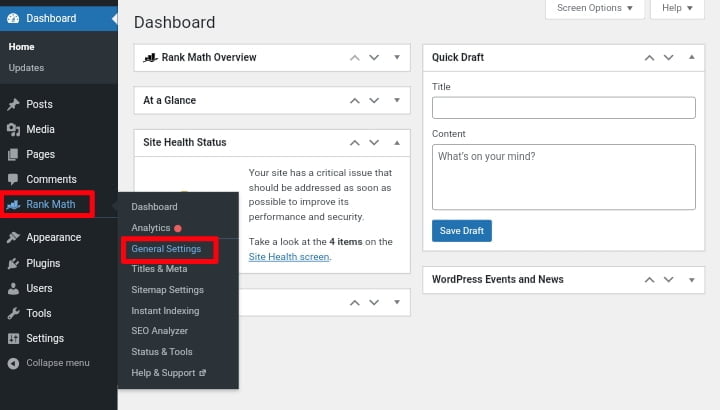
Once the plugin is installed and activated, you will be prompted to set up your account using the setup wizard. We recommend that you read the official guide provided by RankMath to learn how to set up your account by clicking here. Once you have successfully set up your account, go to “Rank Math » General Settings » Webmaster Tools” on the left sidebar and paste the code you copied in the Google Search Console section.
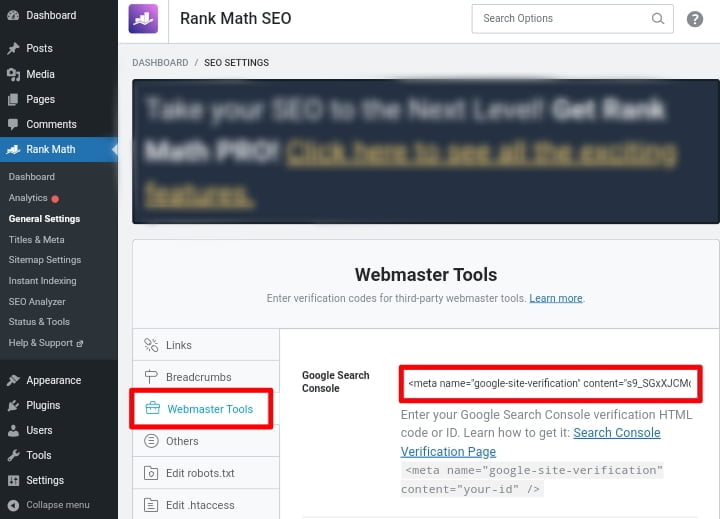
And after that, save the changes. To make the changes take effect, click the Save Changes button at the bottom. And then go back to Google Search Console settings and click the “Verify” button to check the verification status.
Google Search Console will now look for the HTML tag in your website code, and if it finds it, it will display a success message indicating that ownership has been verified. If you don’t see a success message, you may need to clear your WordPress cache. This ensures that Google can retrieve the most recent version of your website.
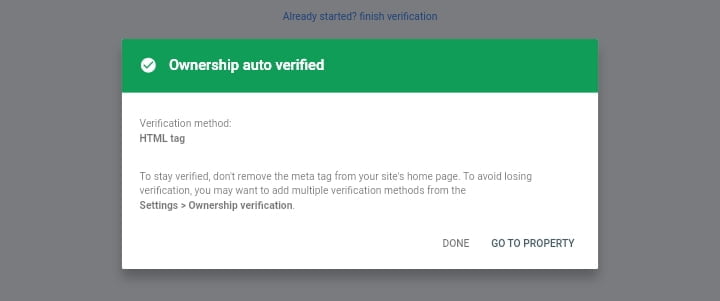
That’s all that is required. Your website has been successfully added to Google Search Console. You can now access your Google Search Console dashboard by clicking the “Go to Property” link.
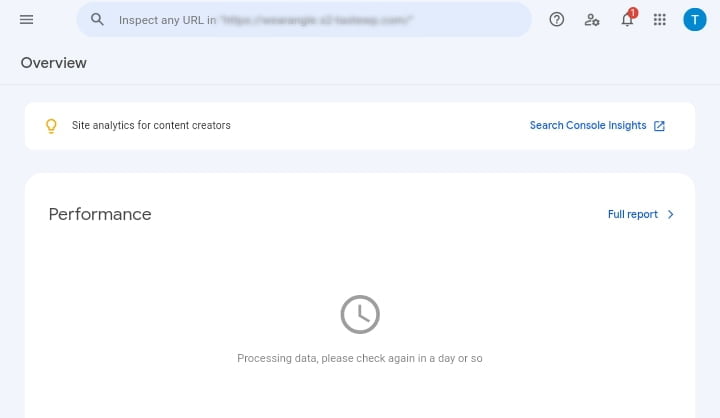
From the dashboard, you can access all of your website’s performance reports, such as how your website performs in Google searches and index coverage, which displays the total number of your website’s pages and posts that are indexed. However, because you just added your website, you may need to submit a sitemap, which will take us to step 4.
Step 4: Submitting Your Website Sitemap To Google Search Console
You may be wondering what a sitemap is. A sitemap is a file that contains a list of all the pages on your website, as well as information about each page and post, such as when it was last updated and how regularly it changes.
The sitemap you will submit to Google Search Console is an XML sitemap that will help Google understand the structure of your website and ensure that all of your pages are properly indexed. This will allow Google to crawl your website more effectively.
If you followed the steps above to install the RankMath plugin, RankMath will automatically add the XML sitemap to your website. In your WordPress dashboard, navigate to the Sitemap settings by clicking on the Rank Math section in the left sidebar. To access the settings, hover your mouse over the menu and then click Sitemap Settings.
Next, simply go to the section that says “Your sitemap index can be found here” and click on it. When you click on that link, you will be taken to your XML sitemap.
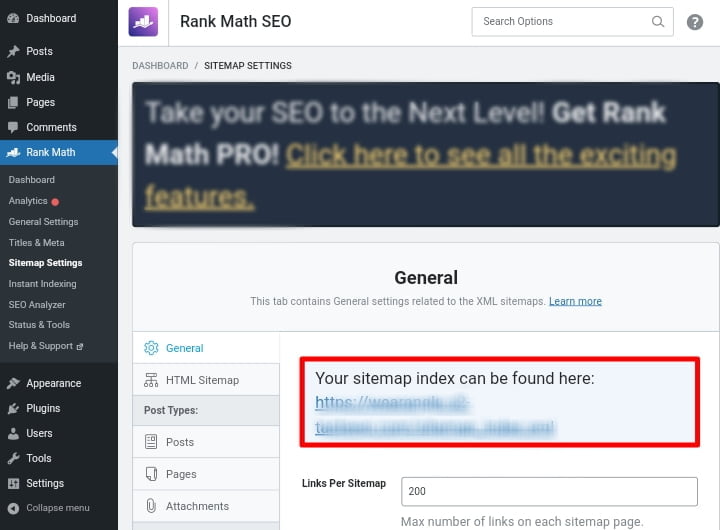
From this page, you can just copy the URL of the sitemap from your browser’s address bar. Alternatively, you can also directly access your XML sitemap by adding sitemap.xml at the end of your website address. For example, https://example.com/sitemap.xml. Now that you’ve completed the XML sitemap process, let’s quickly submit it to Google so that it can index your website.

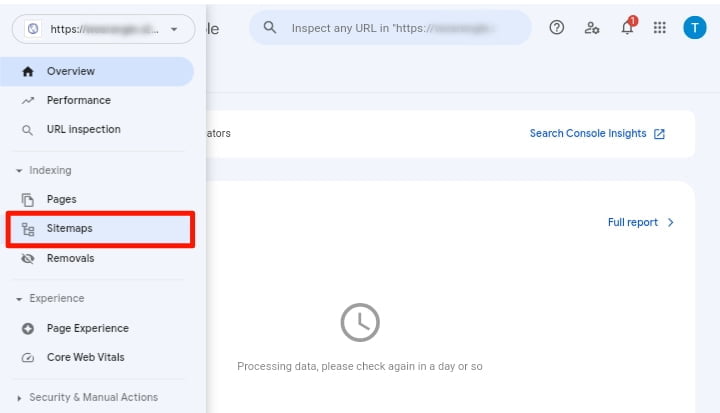
Simply navigate to the Google Search Console dashboard and click on the “Sitemaps” option from the left column. Following that, instead of entering the full URL https://example.com/sitemap.xml, enter sitemap_index.xml under the add a new sitemap section and click the Submit button.
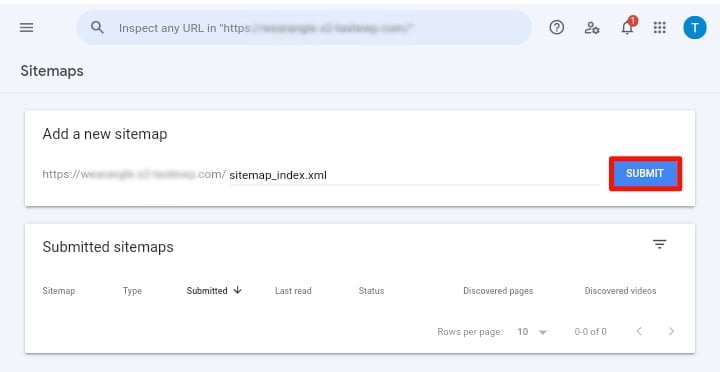
That’s all, you have now successfully added your website to Google Search Console. Google Search Console will now include your sitemap URL and crawl your website.
Apart from the sitemap_index.xml file, which contains a list of all the pages and posts on your website, RankMath also includes a number of other sitemap options, such as a post sitemap, a video sitemap, a local sitemap, a news sitemap, and RSS sitemap, which can help you gain a competitive advantage and rank your website higher in terms of SEO.
After some time, when you go back to your Google Search Console dashboard you can start viewing your website data and search performance like your top performing Keywords, impressions, total clicks, average click-through rate (CTR), and more. You can also use these reports to determine how well your website content performs in Google search results.
We hope you found this guide helpful. If you liked it, please share it on social media with others, especially those who want to submit their website to the Google search engine, and if you have any questions regarding this guide please leave them in the comments section below.


Special Web Hosting Offer | $2.99/mo