
If you’re having trouble getting your new blog posts and pages, or existing ones, indexed on Google even after manually submitting them through Google Search Console, you’ve come to the right article.
We used the submit URL feature in Google Search Console to manually submit our new blog post URL for indexing, but this can take time and effort if done manually all the time, with the indexing API, you can easily automate the process.
This method can also help your website stay one step ahead of the competition by ensuring that it is crawled and indexed faster and has the opportunity to rank before its website, which is important when it comes to competitive content.
In this article, we’ll show a step-by-step guide on how to set up Google instant indexing API for your website. This technique will allow Google to crawl your website’s posts and pages instantly after they’ve been published or updated.
Table of Contents
What Is Google Instant Indexing API?
Google Instant Indexing API is a tool that notifies Google immediately when you publish new content, such as a blog post or page, or when you update the content on your website. As a website owner and blogger, this technique will save you a lot of time when ranking your blog posts.
When we publish a new blog post on this blog, we usually use the Google search console’s submit feature to manually submit the URL so that Google can index it faster. However, it may index after a few minutes in some cases, but it may take a long time to get it indexed, even after using the submit URL feature on Google Search Console.
However, with the help of the instant indexing API technique, you can index your posts and pages on your website faster, even if you have an e-commerce website or a news website without having to use the submit URL feature on Google search console. You can use it on any CMS platform you are using for your website, including WordPress.
How Does Google Instant Indexing Work?
I know you’re probably wondering How Does Google Instant Indexing Work? Unfortunately, there isn’t a better way to explain it, but we’ll try to explain it in a way you can understand below.
This is how it works, in my opinion: first, you need to register your website or blog with Google Search Console for the website or blog for which you want to use the instant indexing feature. After you register your website, you will also submit your website sitemap.
Sitemap is a file that contains information about all of your website’s pages and posts. Don’t worry if you don’t know how to register your website with Google Search Console; we’ve published a detailed guide on how to do so on this blog; please read it here.
After signing up for Google Search Console and submitting your sitemap, you will install the Instant Indexing API on your website, which we will show you how to do in this post. The API is a tool that allows your website to communicate directly with Google’s search engine, notifying it when new or updated content is published.
When new content is published or updated on your website, you as the website owner can now use the Instant Indexing API to introduce the content to Google. This then notifies the Google search engine that new content on your website is ready for indexing.
Google will now start crawling and indexing the new content after receiving the notification from your website through the API. This process usually takes a few seconds or minutes, as opposed to hours or days for using the manually submit feature from the Google search console or normal web crawling and indexing processes.
Finally, once Google has indexed the new content, it will appear in search results. When people search for relevant keywords or phrases related to your content on Google, they can now find the new content. This is how large websites and blogs index their contents; when you search on Google, you will see something like “posted 2 minutes ago”; they are eventually using the Instant indexing technique.
Now that you understand what Google instant indexing API is and how it works, let’s take a look at how you can set up Google instant indexing API to rank your blog posts and pages faster on Google search results for more traffic.
How To Setup Google Instant Indexing API
Before you start, keep in mind that using Google Instant Indexing API is optional and does not guarantee your website’s rankings. This includes your posts and pages. Google also recommends using the instant Indexing API only for JobPosting or BroadcastEvent embedded in VideoObject websites. You are proceeding at your own risk.
According to RankMath SEO, the popular WordPress SEO plugin tests, they discovered that it worked well on any type of website, including blogs and e-commerce, and they have created a plugin for you to test it.
We’ll show you how to do it with RankMath’s instant Indexing plugin. This process will only work for websites that use the WordPress CMS, so if you use another blogging platform, such as Blogspot (Blogger.com), this process may not work for you.
Ready? let’s get started:
Step 1: Login To Google Cloud Platform
You need to first enable access to the API before you can use or access it. To do so, you need to first sign in to the Google Cloud Platform and then create a project for the API.
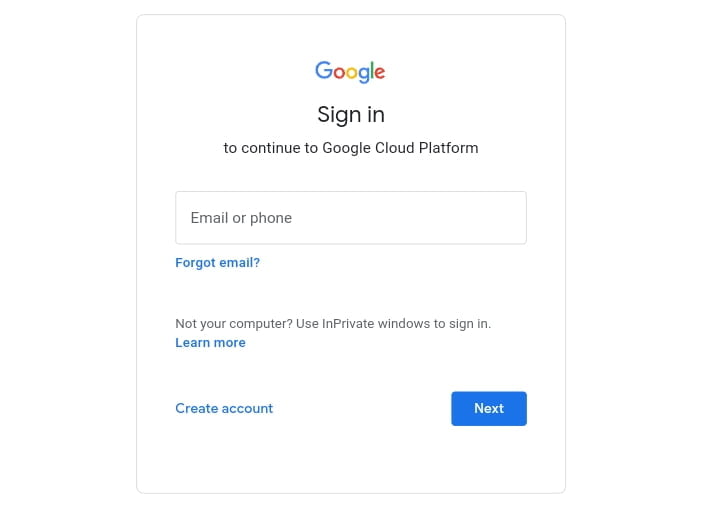
Visit the Google Cloud Platform homepage by clicking here. If you are visiting for the first time, you will be prompted to log in with your Google account, which is your Gmail account. Quickly login with it to proceed to the next step, if you do not have a Gmail account, quickly create one for yourself.
Step 2: Create A New Project
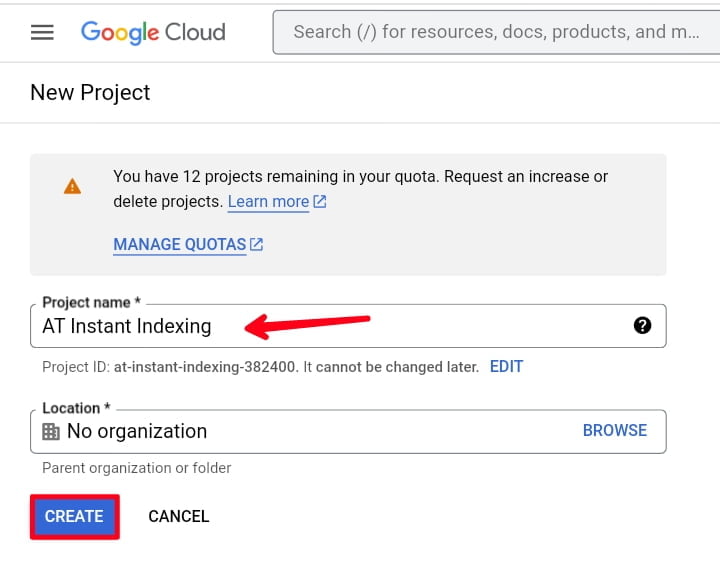
After that, you should then create a new project for the API. Quickly navigate to the “Create Project” section on the right-hand side and click on it.

In the next screen, enter a project name that you will remember later, for example, you can just use “Instant Indexing“. And then click the “Create” button; in the location section, there is no need to select any organization; simply leave it at no organization.
Step 3: Enable Access To The API
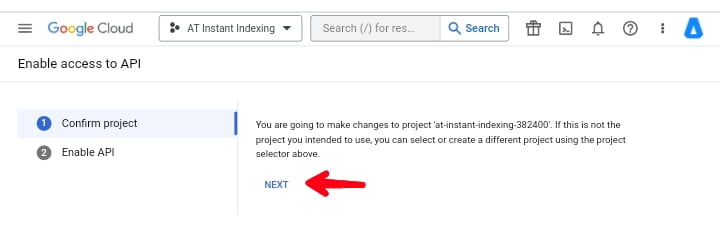
After creating the project, you will need to enable it to access the API. The following screen would appear in the next step. If the selected project is the one we created for “Instant Indexing“, confirm it; otherwise, change the project using the drop-down at the top. After you’ve selected the project, click the “Next” button.
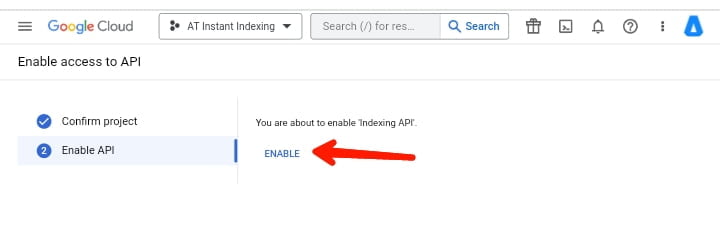
After clicking Next, you will see the “Enable” option, simply click on it to enable the project to access the Instant Indexing API. You can close this tab once you’ve enabled it.
Step 4: Create A Service Account
After you have successfully enabled the project to access the Instant Indexing API, you will need to create a service account, you can visit the services account page by clicking here.
Once there, you will be prompted to choose the API project for which you want to create this service account. Quickly select the one you created in the previous step.

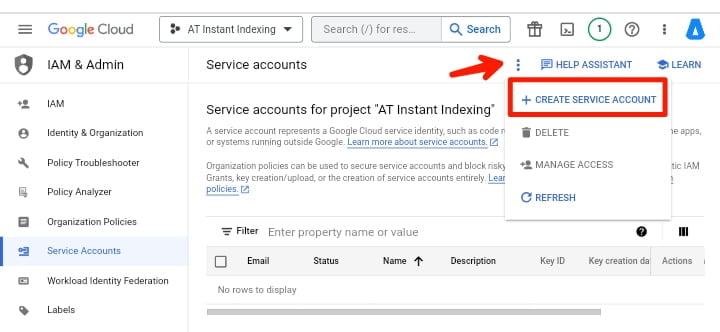
After you’ve chosen the project for which you want to create a service account, you’ll be taken to the following page, where you can simply click the “Create Service Account” button in the three vertical dots column.
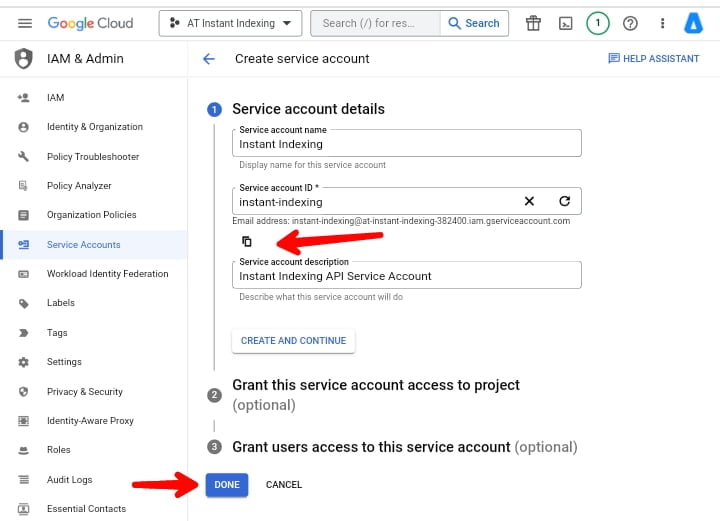
On the Create service account screen, enter a name and a description for the newly created service account. After entering the name and description, simply select and copy the “Service Account ID” (which looks like an email address), because you will need it later to complete the process. Then, at the bottom, click the “Done” button.
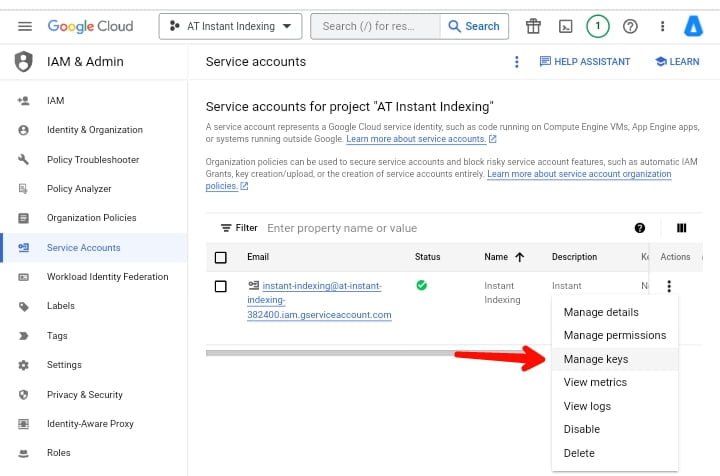
After successfully creating the service account, navigate to manage keys for the service account. From there, you will be able to download the file containing your API key. Simply click the three vertical dots in the Actions column, then choose “Manage Keys“, as shown in the screenshot below.
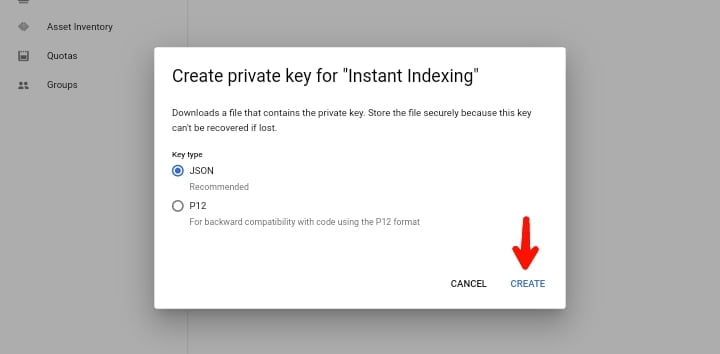
You will then be directed to the following page, where you can create a new JSON key for your service account by clicking “Add Key” and then selecting the “Create New Key” option.
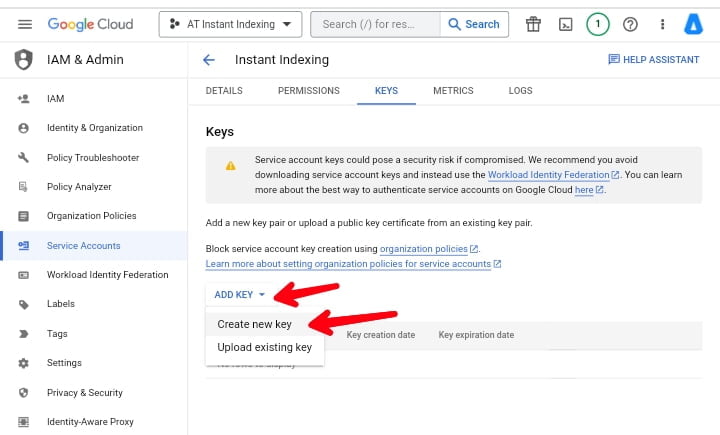
When prompted in the overlay, choose the recommended “JSON” format and click “Create.” When you click Create, the.json file will be downloaded and saved to your device, meaning that you have successfully created the API key and can move on to the next step.
Step 5: Make the Service Account The Owner Of Your Google Search Console Property
The next step is to make the service account the owner of your Google Search Console property, but first, you need to register and verify your website with Google Search Console (if you haven’t already), which is super simple if you follow our step-by-step guide on how to add your website to Google Search Console.
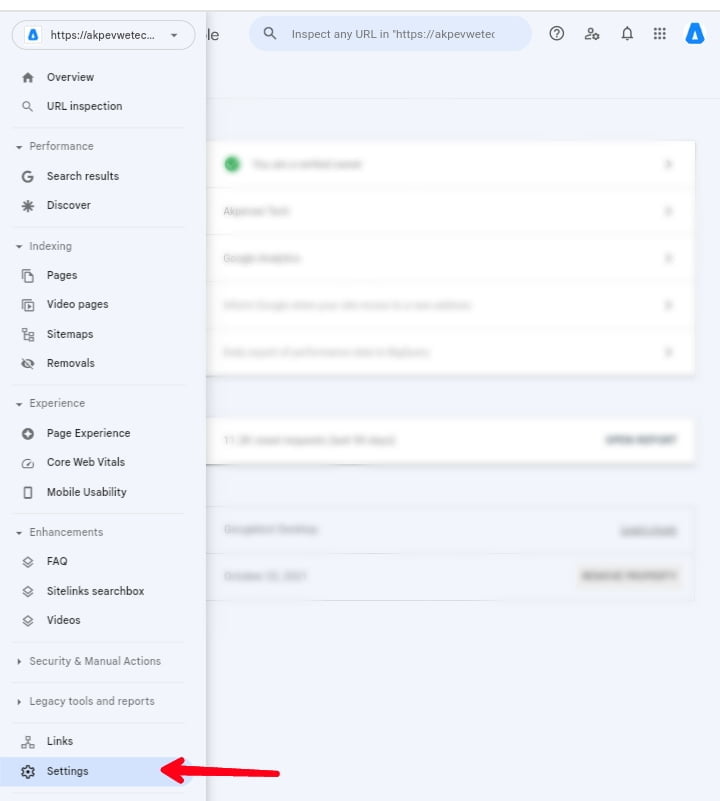
After you’ve added your website and verified its ownership, navigate to the Google Search Console dashboard and click on “Settings” close to the bottom.
Note: If you’re configuring a subdomain for your WordPress website, make sure you’ve selected the domain level property in Google Search Console first, or you’ll have to add the service account as the owner for each subdomain property separately.
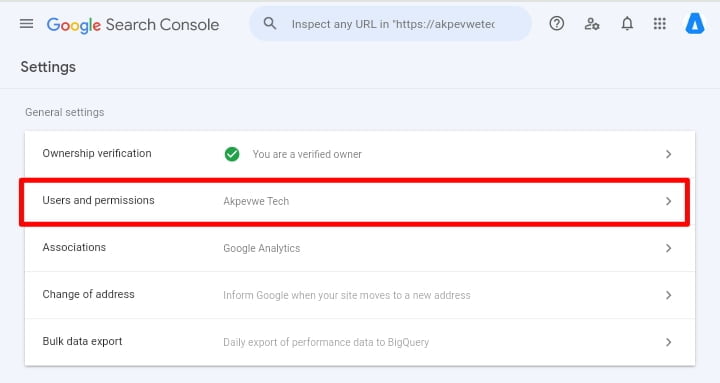
After that, click on “Users And Permissions,” and then add a user to your Google Search Console property. Click the three dots next to your account, followed by the “Add User” button.
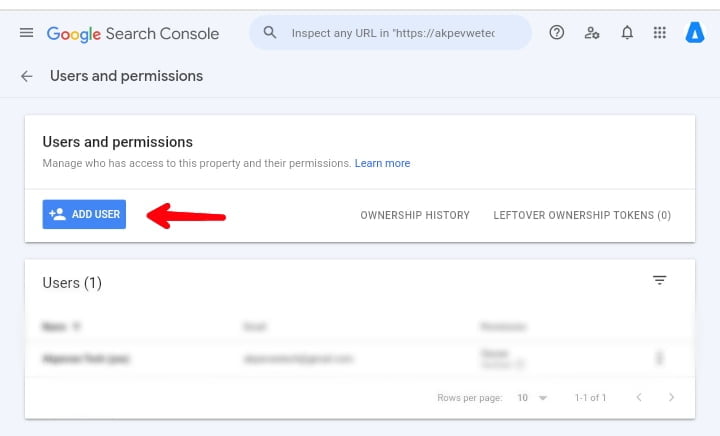
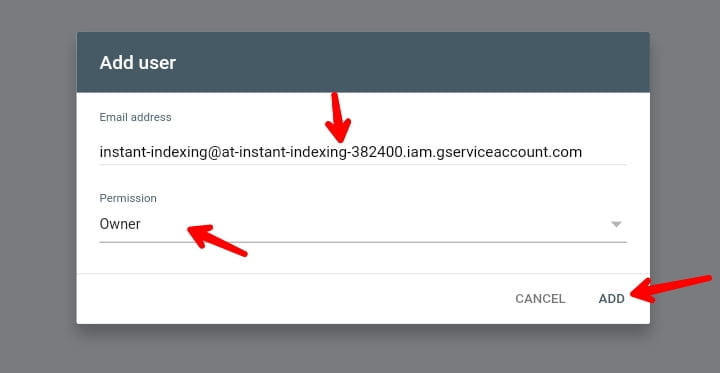
A popup window will now appear. In the “Email address” field, enter the Service Account ID (the one you copied earlier that looks like an email address). Check that you have provided “Owner” level permission, then click “Add.”
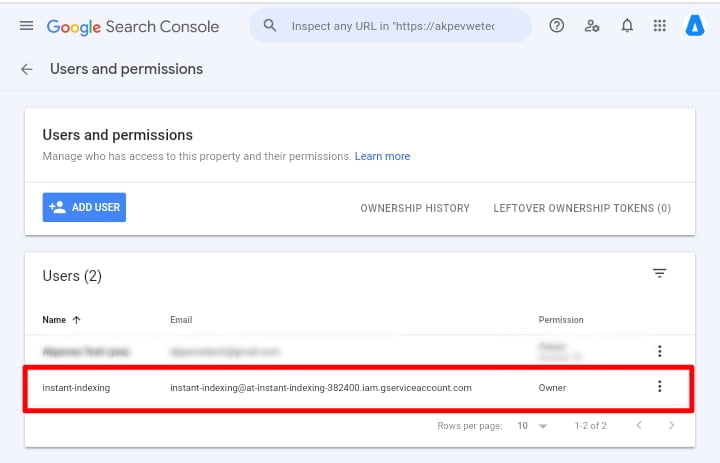
After that, you should see the Service account listed as a new Owner in a few moments. You can use a single Project, Service Account, and JSON API Key across multiple sites; just make sure that the Service Account is added as the Owner in the Google Search Console for all of the websites.
Step 6: Install The Instant Indexing Plugin By RankMath
After successfully creating the API key and adding the service account to your Google Search Console property, the next step is to install and configure the RankMath Instant Indexing plugin on your WordPress website.
As previously stated, this process will only work for WordPress websites because WordPress allows you to install plugins (just like the RankMath Instant Indexing plugin) to add additional functions and features to your website.
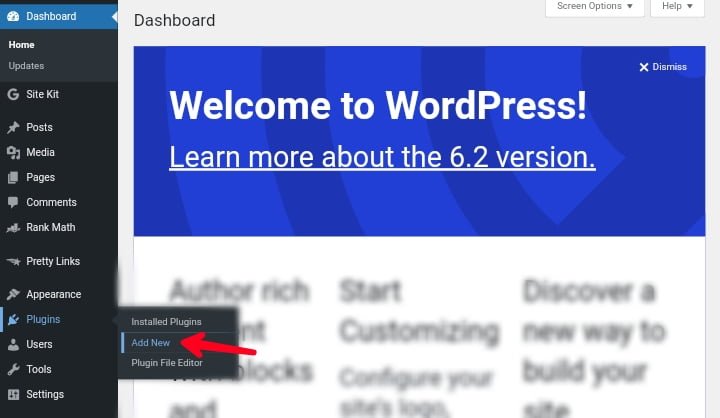
You can download the Instant Indexing plugin from the WordPress.org website and manually upload it to your WordPress website before configuring it, but the best way is to install it directly from your WordPress Admin panel by navigating to “Plugins » Add New.”
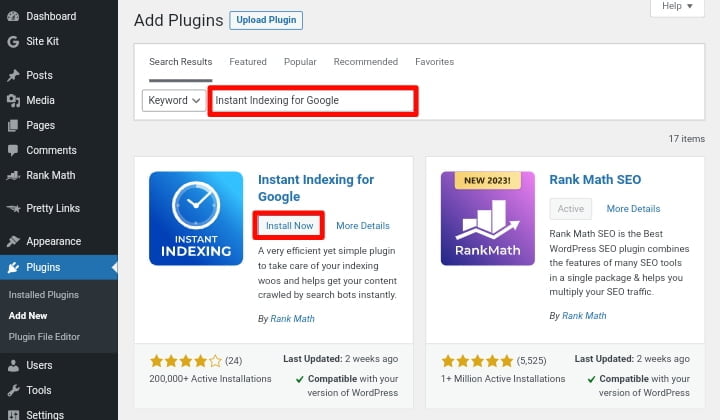
And then search for Instant Indexing for Google, where the plugin will appear, and then click “Install Now“. Once installed, click “Activate” to activate it.
After installing and activating the plugin, you should also install the RankMath plugin. This is optional; you can use it without installing RankMath; however, in this case, we installed RankMath alongside the plugin.
Next, navigate to “Rank Math » Instant Indexing” Settings in your WordPress admin area, and under the Google API Settings tab, paste in the contents of your JSON file or simply upload the file.
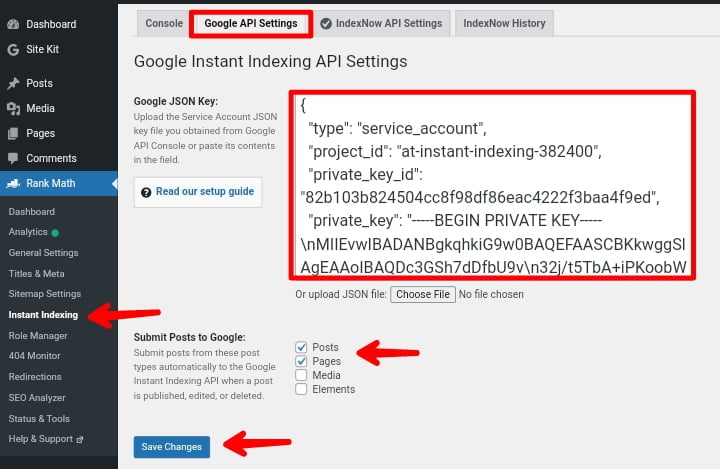
Select the Post Types for which you want the Indexing API to notify Google that a post has been published, updated, or deleted, and then click the “Save Changes” button.
Following that, It’s now time to use Google’s indexing API to have any post or page on your website indexed almost immediately. Simply Navigate to the “Console” tab at the top of the page.
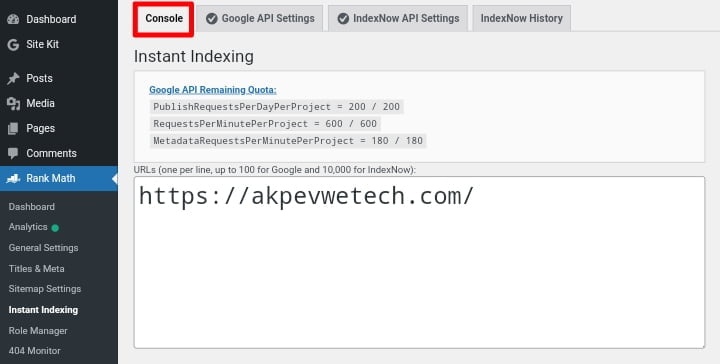
In the Instant Indexing section, enter the URLs of the pages or posts you want to instantly index, and choose “Google: Publish/update URL” as the Action. Then, click the “Send to API” button.
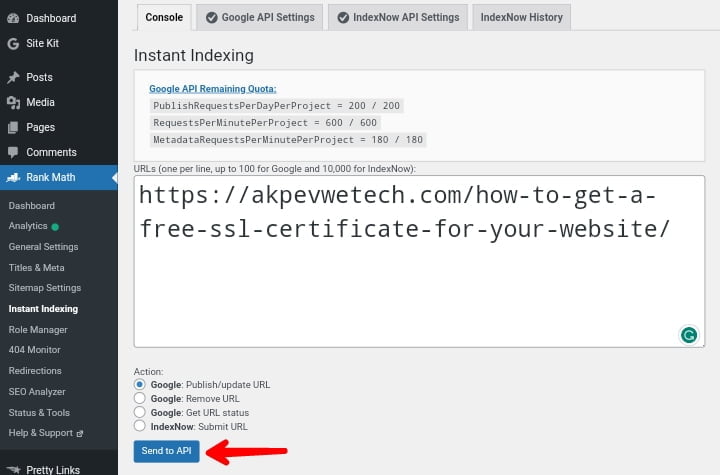
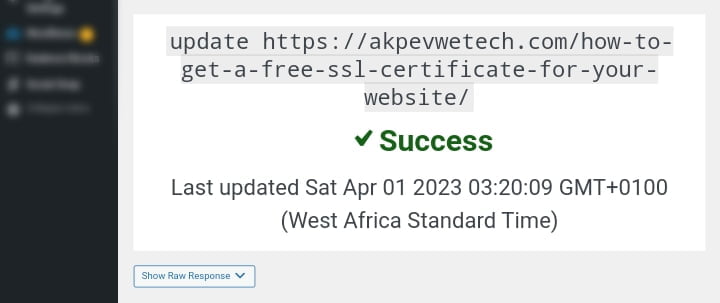
In a few seconds, you should see a successful response from the API, meaning that it was successfully sent to Google for indexing.
Instead of manually entering the URLs and then indexing them, you can do so from the WordPress Posts section. There should be an option to update or check the status of a post there. You can also use the bulk actions options to quickly index or update multiple posts.
And then you’re done configuring the instant indexing API, and your posts and pages are ready for instant indexing. It may take a few minutes for your website to begin crawling after successful submission.
Conclusion
This is practically how you can set up Google instant indexing API for your website or blog using the Instant Indexing plugin by RankMath.
We do not recommend using Instant Indexing if your website or blog is new or less than one year old because it may affect your website. If your website is older than that, you can use it but at your own risk.
Before you go, take a look at How To Speed Up Your WordPress Website, where we listed 10 proven ways you can implement to improve your website performance, and Blogging Best Practices, where we listed 15 tips to help you grow your blog.
We hope you found this article helpful. If you liked it, please share it on social media with others, especially those who are struggling to rank their new blog posts on Google, and if you have any questions please leave them in the comments section below.


Special Web Hosting Offer | $2.99/mo