
People enjoy sharing their ideas, their experiences, and their opinions, and they may even attempt to reach people around the world through blogging. Starting a personal blog is a better option to get your way around it.
Unlike a business blog that focuses on business-related stuff, a personal blog is focused on the author’s personal life, interests, experience, and hobbies, and it has become a popular way for people to connect with others, build an online community, and share their passions and knowledge.
In this article, we will first explain what a personal blog is. We will then show you a step-by-step guide on how to start a personal blog, covering everything from setting up your blog to promoting it and making money from it.
Are you ready? Let’s get started.
What Is A Personal Blog?
A personal blog is all about you; they are places where you can share your ideas, experiences, stories, opinions, and perspectives with the rest of the world. It is far different from a business blog, a personal blog is focused on you as the author’s personal life, interests, and hobbies.
In a personal blog, you can write about anything, including teaching, daily life and experiences, interests, hobbies, and any other topic. The main aspect of a personal blog is that the blogger or author is free to express himself in ways that corporate, business or even fitness blogs do not allow.
When you create a personal blog, you can establish yourself as an authority in your field, build your own personal brand, connect with others who share your interests and passions, and build a community around your blog.
You now understand what a personal blog is. Let’s take a quick look at how to start a personal blog. We’ll go over each step in detail so you can get started right away if you’re ready.
How To Start A Personal Blog: Step-by-step Guide
- Choose Your Blog Topic
- Choose Your Blog Name
- Choose Your Blogging Platform
- Buy Domain And Hosting
- Install WordPress CMS
- Install A Blogging Theme
- Create Your First Blog Post
- Promote Your Blog
- Make Money From Your Blog
Starting a personal blog follows the same steps as starting a regular blog, from choosing a blog topic to choosing a blogging platform to purchasing a domain name and hosting, and so on. However, domain names and hosting may be more expensive, so we show you how to get started on a small budget.
Below, we will cover each process step by step so that you can easily navigate to the steps you need, such as choosing a blog topic, choosing a blogging platform, buying a domain name and hosting, setting up your blog, and so on.
Let’s get started.
Step 1: Choose Your Blog Topic
A blog topic is required for every blog, including personal blogs. A blog topic is a major subject or niche about which you choose to write on your blog, including blog posts. It is the main point of the content and establishes the tone.
So you need to choose the right topic for your blog. The right blog topic can help you attract readers, engage them with the content you provide, and keep them coming back for more. On the other hand, choosing the wrong topic can lead to low engagement, a lack of interest, and fewer visitors to your blog.
The topic you should choose should be related to your niche, in this case, a personal blog, and it should be something that your target audience is interested in reading. You can choose to write about your experiences, stories, or opinions, or you can even choose all three topics.
Step 2: Choose Your Blog Name
Now that you’ve chosen on a topic for your blog, whether it’s about your experiences, stories, or thoughts, you’ll need a name for it. Let’s look at how you can choose a name for your blog.
A blog name is the title of your blog that represents your brand, identity, and purpose. It is the initial impression that viewers receive of your blog and can influence whether or not they will read your blog content. For example, the name of the blog you are reading is Akpevwe Tech.
So, in order to come up with the perfect name for your blog, we recommend that you use a name that reflects the topic of your blog. This will help visitors with an understanding of your blog content and what they can expect from it, as well as search engines such as Google. This will increase the search engine ranks and exposure of your blog.
We will show you three methods for coming up with the perfect name for your blog below.
How To Come Up With The Perfect Blog Name
Coming up with the perfect blog name for your personal blog is important and can be a challenging task, but don’t worry because, as mentioned earlier, we are going to help you and show you how to do it.
Method 1: Using Your Own Name
Using your own name for your personal blog is a great idea; in fact, almost all of the personal blogs you see today include their name, which can help improve your blog’s name popularity, especially when people search for your name on Google and your blog appears alongside.
We recommend using your own name for your blog because it will be easier for your readers to remember and spell and will establish you as an authority on your blog topic. Popular personal bloggers like James Clear do the same thing; he uses his name as his blog name and has grown in popularity and attracts more and more visitors to his personal blog.
For example, if your name is Mark Dru, we recommend using Mark Dru as your blog name. You may also add something to it, such as Mark Dru’s Blog, Blog Of Mark Dru, and so on. Just make sure you use a name that is easy to remember and spell.
Method 2: Using A Nickname
Using a nickname is another method you can use to come up with a perfect and unique name for your blog, for example, you can combine and match it with any phrase or word you can think of.
For example, if your nickname is Drick, you can combine the phrase with something else, such as adding Blog With or Blog Of to your nickname Drick, resulting in Blog With Drick or Blog Of Drick. Simply try to combine words or phrases to make a name for your personal blog.
Method 3: Using Your Competitor’s Blog Name As Inspiration
The last method you can try after trying to make use of your name or nickname is to use your competitor’s blog name as inspiration. This is a very smart method because you can spy on them to see what names they are using and how they go about their blog.
However, it’s important to keep in mind that when we suggest “use your competitor’s blog name as inspiration,” we do not mean that you should copy your competitor’s blog names or content. Instead, use their blog names and techniques as inspiration for your own unique approach.
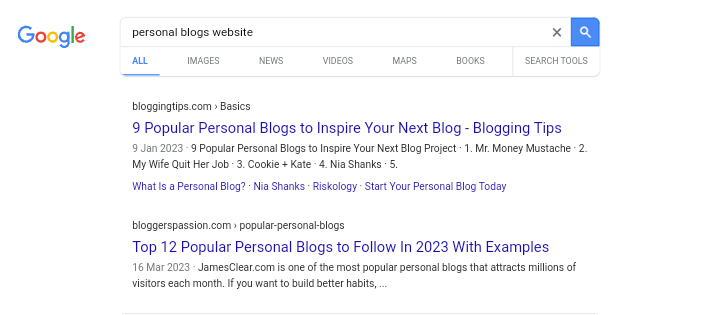
I know you’re wondering how you’re going to find out who your competitors are. It’s simple. Simply search Google for the keyword “personal blogs website” and you’ll see a bunch of blogs appear simply click on them and you’ll see other bloggers who have listed most of the popular personal blogs websites from there you can click on one of them to see what names they’re using and so on.
You can also check out your competitors’ website traffic to see what techniques they are using to drive traffic to their blogs, such as the topic they are writing about, the keywords they are using, how they write their content, and so on.
If you need more methods to get name ideas for your blog, check out this article on How To Get Blogging Name Ideas where we listed 5 best ways that you can use to get name ideas for your blog. It doesn’t matter what kind of blog you’re creating, whether it’s a fitness blog or a personal blog, the methods listed will work well.
Now that you’ve come up with a few blog ideas, check if the domain name (we’ll go over what a domain name is and how to get one later) and social media handles are available. To check domain availability, use a free domain checker tool from this blog or Namecheap, and to check handle availability, use social media networks like Twitter, Instagram, and Facebook.
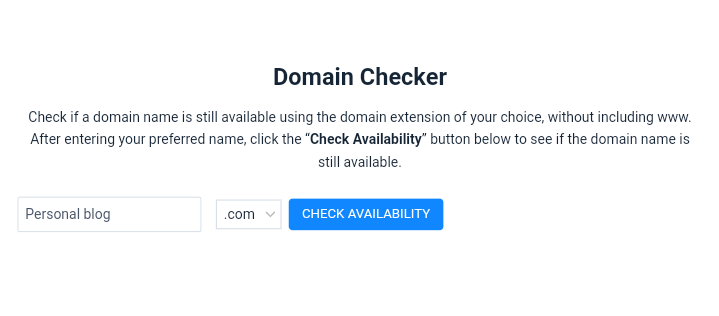
To check the domain availability of your blog name using our blog’s free domain checker tool, go here. Once there, enter the name and select the domain extension we generally recommend .com extension, which is selected by default, you can also use alternative extensions and then click the “Check Availability” button.
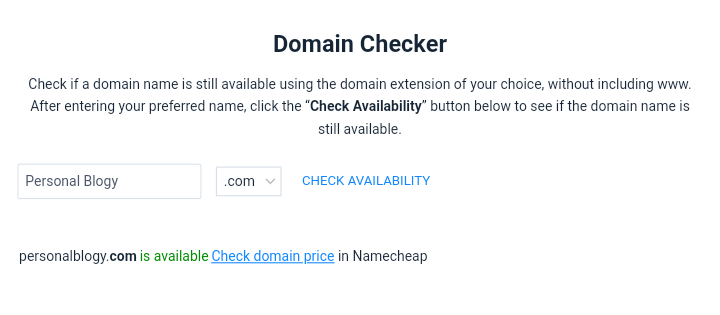
We now use a tool to look up the name. If the domain name is available, you will get a success message with the words “is available” in green text and will be able to register it immediately with one of our recommended domain registrars, Namecheap.
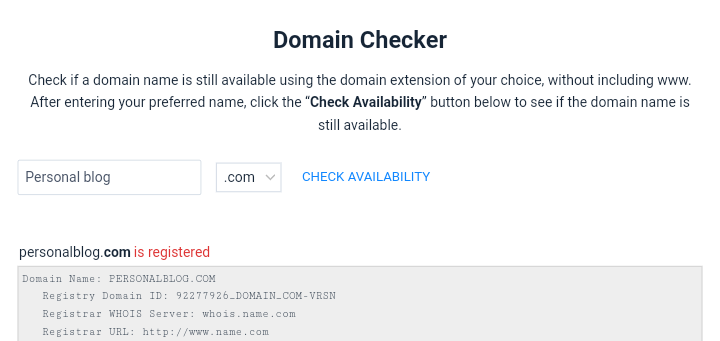
When you see a message in red text that says “is registered” it means that the domain name has already been taken and purchased by another website owner. So, try searching for another name till you find one that is available and you can purchase it right away before anyone else.
Step 3: Choose Your Blogging Platform
Now that you’ve decided to start a blog, you’ve probably heard of a blogging platform. If you haven’t, a blogging platform is a software or service that allows you to create and publish content on the internet in the form of a blog.
With the help of a blogging platform, you can create, edit, and manage your blog without requiring extensive technical knowledge, like coding. Most of them have a WYSIWYG (What You See Is What You Get) editor. This is an easy-to-use interface that allows you to create and format content without the need for coding or HTML knowledge.
While most of them have a Content Management System (CMS), which is WordPress.com a software tool that allows you to effortlessly create, edit, and manage your blog content, including posts, pages, and media, without any coding or HTML experience. They also have themes and pre-made templates that you can import and customize for your blog.
Below we will list some of the most popular used blogging platforms that have the WYSIWYG and Content Management System features for you to choose from for your personal blog. Most of them are also free, so you can create a blog with no money by using the free blogging platforms.
1. WordPress.org
WordPress.org is the most popular blogging platform in the world, and it is the Content Management System (CMS) that powers over 35% of all websites (including this blog on Akpevwe Tech). WordPress.org is a self-hosted platform that provides you complete control over your blog’s design, usability, and other features.
If you are looking for a suitable blogging platform to use, try WordPress.org because it has almost all the features you might need for your personal blog. Including the ability to install plugins and themes, as well as a wide range of personal blog pre-designed templates to choose from.
However, because it is a self-hosted platform, you will need to purchase a domain name as well as web hosting in order to use it. Not like other free blogging platforms that allow you to use them without purchasing a domain name and web hosting because they usually come with built-in web hosting and provide you with a subdomain name that is not professional and may not be to your liking.
2. WordPress.com

WordPress.com is a hosted version of the WordPress CMS that is available for free, but with limited features. It is suitable for beginners who do not want to deal with technical concerns such as monthly or yearly hosting fees and backups.
However, there are limitations to customization and monetization options for WordPress.com, and you will need to upgrade to a paid plan to access some features. It includes web hosting and gives you a subdomain name for your blog that looks like this: “www.yourblogname.wordpress.com“, which may not be appealing to visitors or SEO.
3. Blogger.com
Blogger.com, often referred to as Blogspot, is a Google-owned free blogging platform. It is simple to set up and use, making it a good option for beginners. In fact, when I first started blogging, I used Blogger.com because I knew little about blogging at the time. As time passed, I switched from Blogger.com to WordPress.org, which I am now using.
Blogger.com, like WordPress.com, has limited customization options, but unlike WordPress.com, you do not have to pay to use it; it is completely free and does not have a subscription plan. It comes with themes and you can even download from third-party websites for any type of theme that you like as well as monetization options like Google AdSense because it is owned by Google.
They also give you the option of adding custom functionalities to your blog using HTML and CSS, although you will need some HTML and CSS knowledge to customize your blog’s look to your needs. It doesn’t matter if you lack these Essential Blogging Skills because there are many Blogger.com tutorials available on the internet, including YouTube.
Other blogging platforms include Wix, Squarespace, Weebly, Medium, and others, but I haven’t used them yet so I can’t say how well they function, but they do feature a WYSIWYG editor that you can easily use to drag-and-Namecheapdrop elements for your blog design.
I recommend WordPress.org for your personal blog because you have complete control over it. In this guide, we will be using WordPress.org to step up a blog, so stay tuned.
Step 4: Buy Domain And Hosting
To properly set up a blog on WordPress.org, you need to first purchase a domain and hosting. Purchasing a domain and hosting is an important step in setting up any website, whether it is a blog, an e-commerce site, or a business website.
A domain is the address of your blog; it’s usually your blog name; it’s the URL people will click or type in their browser to visit your blog, and web hosting is the service that allows your blog to be accessed on the internet; it’s where you can manage your blog files, including access to a file manager, security, and other features.
It is recommended to purchase your domain separately from another domain registrar rather than purchasing the domain and hosting from the same domain registrar. For this reason, we recommend purchasing your domain name from Namecheap.
Namecheap is an established domain registrar that also offers a low-cost hosting solution. It means you get a better price (cheaper price) from Namecheap because they are always offering discounts.
However, we will show you how to purchase hosting and then get a domain name for free for a year alongside the hosting. After that, once it has expired, you can start renewing it, and we recommend Hostinger because they give you a free domain name and are always on sale.
Hostinger is the most affordable hosting company, powering over 28 million websites worldwide. (Including this blog Akpevwe Tech). Their pricing plans start at $1.99 per month, and they provide 24/7 Customer Support that can help you with your blog at any moment.
Click here to visit Hostinger’s homepage. Once you are there, scroll down a bit and you’ll find their hosting plans, which include Single Web Hosting, Premium Web Hosting, and Business Web Hosting.
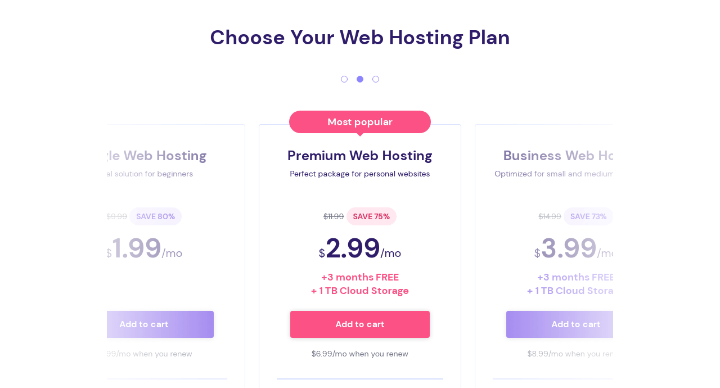
Choose the most affordable hosting plan from the three options available. If you wish to create multiple websites now or in the future, go with their Premium Web Hosting or Business Web Hosting plan.
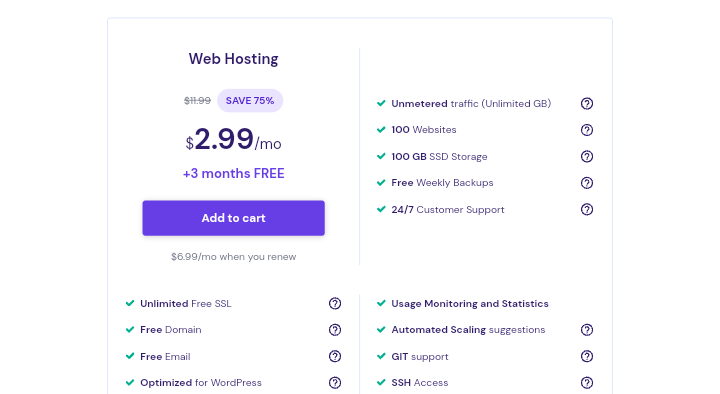
If you’re on a tight budget and want to start a personal blog, go with their Single Web Hosting plan, which costs $1.99 per month. However, keep in mind that Single Web Hosting only allows you to create one website and does not include a free domain, so it’s best to go with Premium Web Hosting, which includes a free domain.
If you choose the Premium Web Hosting plan, simply click the “Add to cart” button to be directed to the cart page, where you can fill out the form and pay for the hosting plan.
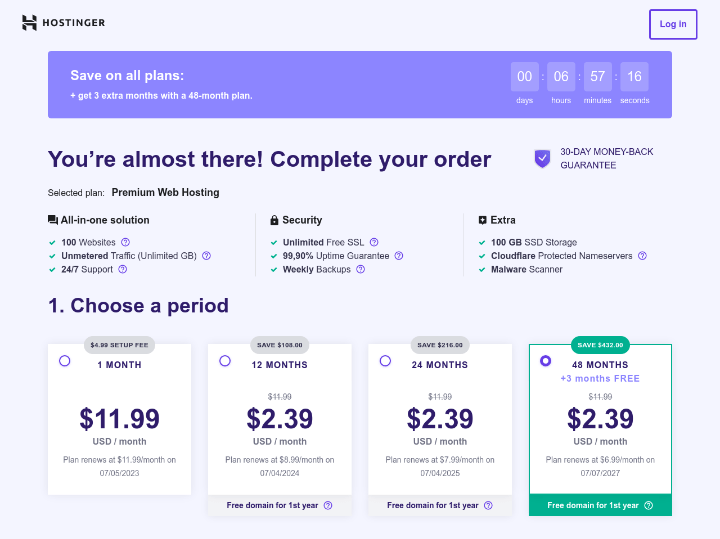
There, you will be asked to select a hosting period. Usually, four periods are available: 1 MONTH, 12 MONTHS, 24 MONTHS, and 48 MONTHS. Choose the one you can afford, and the longer you go, the cheaper it is. This means that if you go with the 48 MONTHS plan, you will receive a much larger discount.
Step 5: Install WordPress CMS
After you have completed the form and purchased the hosting plan, it is time to install the WordPress CMS. WordPress is where you can maintain your blog, and Hostinger makes the installation process easy.
To install WordPress, first, log in to Hostinger using the details you created when purchasing the hosting plan. Go to Hostinger and enter your email address or username and password in the login section. Click the “Login” button. You’ll be taken to the Hostinger hpanel dashboard.
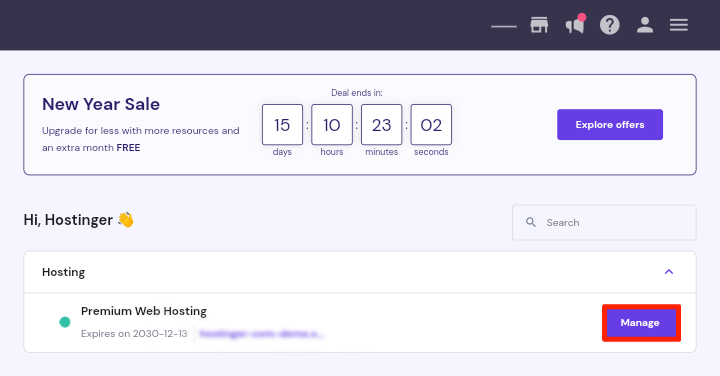
Once logged in, click the “Manage” button next to your hosting plan to get started with the installation process.
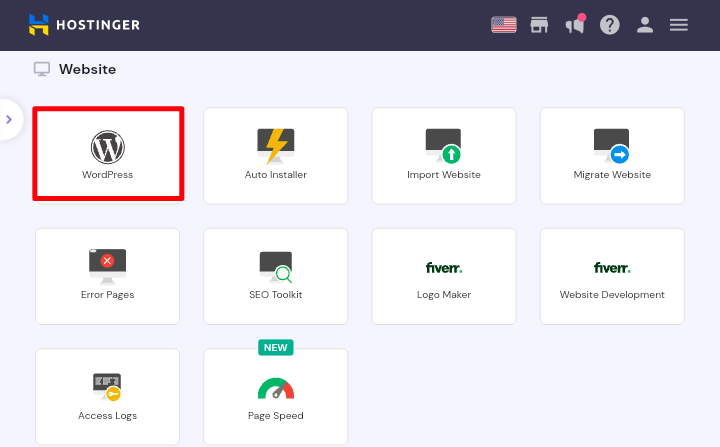
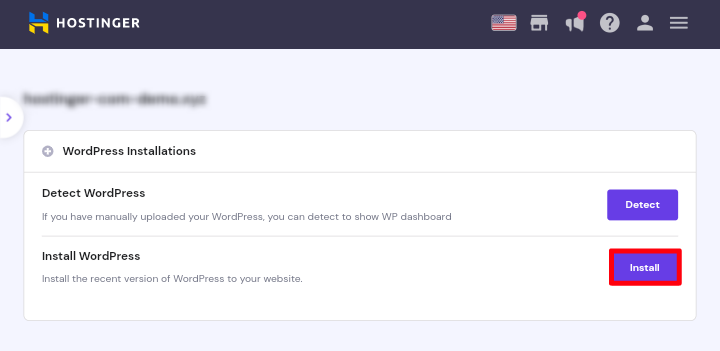
Then, in the website section, look for where it shows “WordPress” and click on it.
Finally, you’ll be directed to the installation page; simply click the “Install” button, and a popup will appear asking you to enter your WordPress login information. You only need to fill out the form with your email address or username and a password, which you will need later to access your WordPress dashboard.
Step 6: Install A Blogging Theme
After you have Installed WordPress, now it’s time to login into your WordPress admin dashboard and start creating your blog with a free blogging theme.
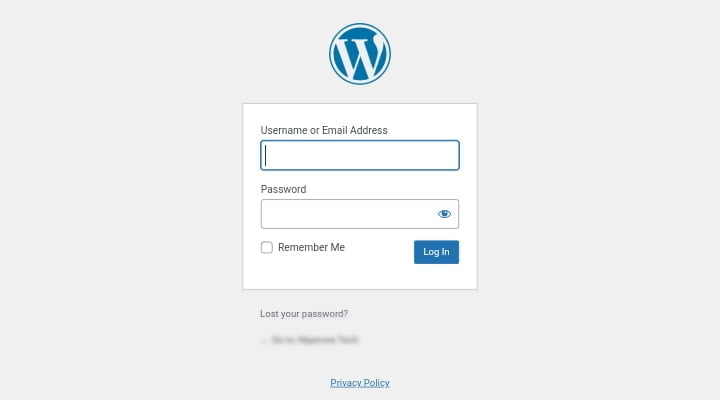
To access your WordPress dashboard, type https://yourdomain.com/wp-admin (replace “yourdomain” with your domain name) into your browser. Enter the username or email address and password you created when you installed WordPress.
After you have login into your WordPress dashboard, you will see the default WordPress theme that comes with the platform, but we will not use it because it does not look professional.
There are many WordPress themes available, including Kadence, Astra, GeneratePress, OceanWP theme, and others. We published a post on this blog listing the top free WordPress themes for bloggers, where you can choose a more suitable theme for your blog.
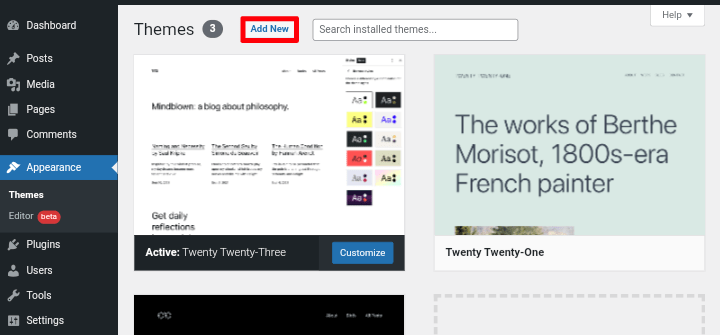
However, if you are looking for a more suitable theme specially designed for a personal blog, you can find one by navigating to “Appearance » Themes » Add New” on your WordPress dashboard.
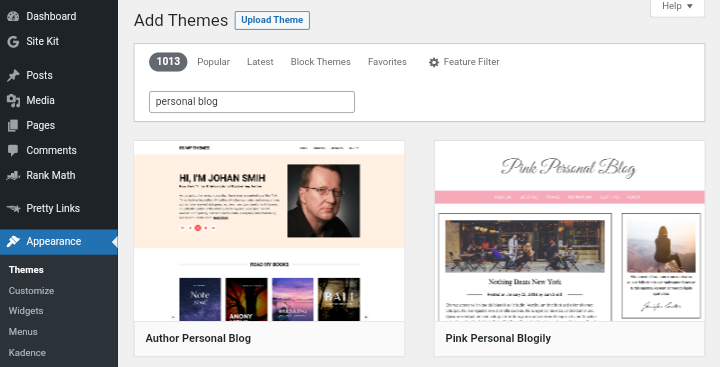
And then, in the search field, type in “personal blog” to view a list of themes that have been personally made for that purpose. Simply choose one and click the “Install Now” button to install it. Once installed, click the “Activate” button to activate it.
Step 7: Create Your First Blog Post
After you’ve installed a WordPress theme and possibly added some pages like the about us, contact us, homepage, and blog page, the only thing left to do is start writing your first blog post.
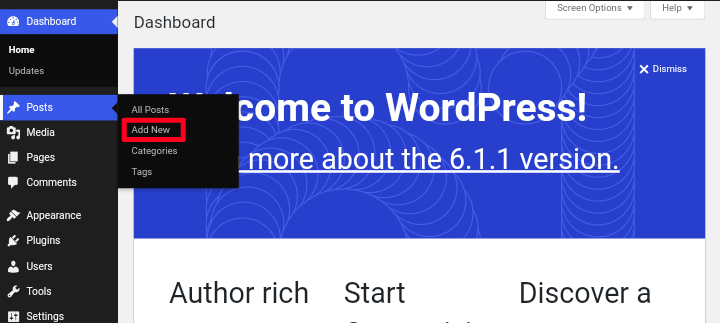
As previously mentioned, your first blog post might be about anything related to your topics, such as your experience or even your lifestyle. To start, navigate to the “Posts » Add New” section of your dashboard. This takes you to the WordPress editor.
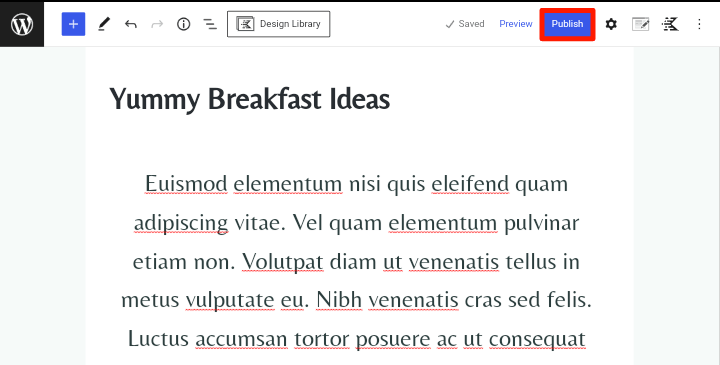
After you’ve finished writing your post, click the “Publish” button in the top-right corner of the screen to make it public.
That’s all there is to it; if you need help writing your blog post, read our step-by-step guide on how to write a blog post, where we discussed how to come up with an effective blog post.
Step 8: Promote Your Blog
Now that you’ve finished creating your blog, installing a theme, and writing your first blog posts, it’s time to promote it effectively.
You can’t expect people to come to your blog unless you promote it. Promoting it will bring it to the attention of individuals who are likely to be interested in your blog and visit it.
Social media is a powerful tool for promoting your blog. After you’ve published your blog posts on your blog, copy the post link and paste it into your social media networks or pages.
If you have a Facebook or Twitter account, you can set up a page for your blog and share useful and informative content with your followers. You can also ask them to share your blog post link on their social media profiles to help you boost traffic to your blog.
Guest blogging can also be used to effectively promote your blog. Guest writing gives you the opportunity to develop authority in your topic, meet other bloggers, and boost traffic to your blog while also getting backlinks.
Guest blogging, which is also known as guest posting, is the process of writing an article or post for another person’s site on your topic or business in order to reach a new audience, improve traffic, and generate organic backlinks to your blog.
Many website owners provide a write-for-us or guest posting section where anyone can submit an article to be published on their site. Look for the owners of those websites and contact them to let them know you’d like to write a guest post for their blog.
Step 9: Make Money From Your Blog
Now that you have successfully created your blog and promoted it, it’s time to finally make money from it. Of course, you need money to pay for your domain name, hosting, and any other Blogging Tools you use for your blog.
There are several ways that you can use to monetize and make money from your blog, but for your personal blog, the best way to monetize is through advertisement. Forget about any other monetization method like affiliate marketing or sponsored content.
You can sign up for any advertising network, such as Google AdSense or Ezoic, and once approved, ads will start to appear on your blog, and you will start to earn money based on the number of page views, which is an impression, and the number of clicks, which is the total number of people who click on the Ads.
That is all you need to start a personal blog and make money from it. All that is left for you to do now is follow the process and start your blog. The process is quite straightforward; all you need to do is follow it carefully and you are good to go.
We hope you found this guide helpful. If you liked it, please share it on social media with others, especially those who are looking to start a blog about their experiences and knowledge, and if you have any questions please leave them in the comments section below.
Special Web Hosting Offer | $2.99/mo